Creating an E-mail Confirmation
- To create an e-mail confirmation on the left side master menu click:
- {Email} {Template} {Create new Template}
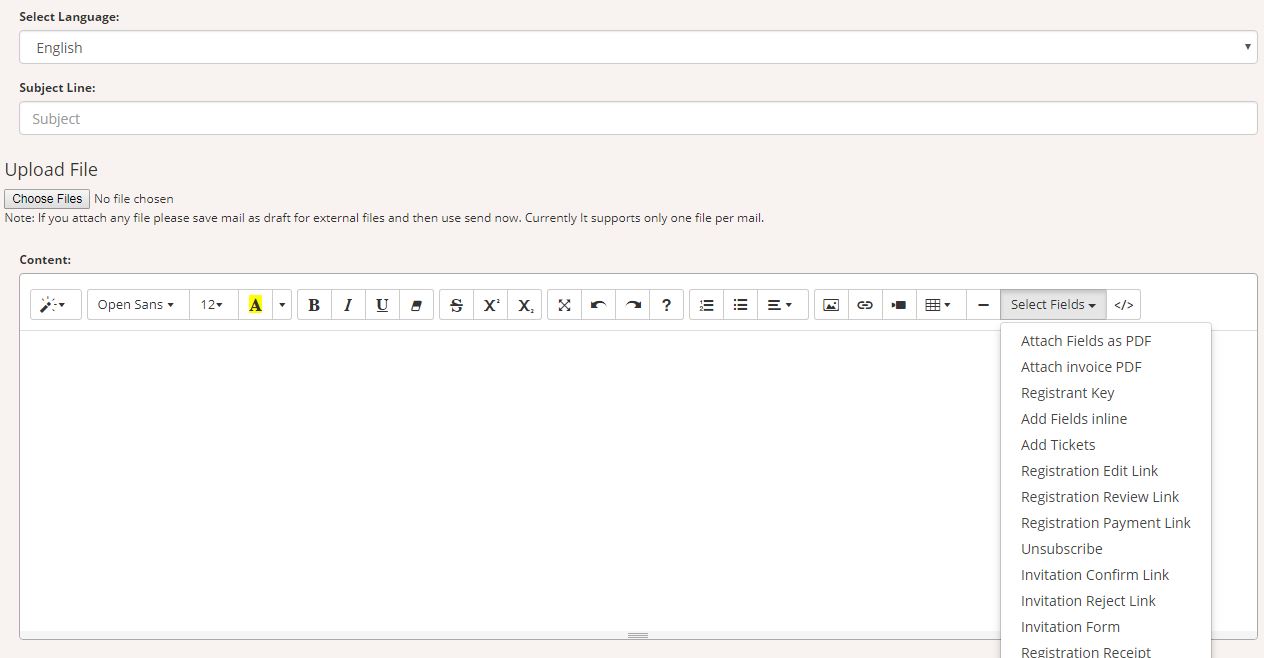
- Select your Message Type (Most common is Confirmation Message which the registrant would receive after they have registered)
- Include a title (this will be the template name) and description (ie. E-mail confirmation)
- You can Upload a File to be added to the e-mail
- Include a "Subject Lin
- The "Content" will be what is shown in the body of the e-mail. To add attachments to the e-mail such as the completed fields form and invoice click on "Select Fields" and choose "Attach Fields as PDF" and "Attach Invoice as PDF"
- You can customize the e-mail by adding in certain fields from the "Select Fields" list. Such as Dear "First Name" "Last Name". This will pull their names from their registration and add it into the e-mail confirmation for all registrants.
- Click Save Template

To Edit an E-mail Template
Under {E-mail} {Template} you will see the templates you have created. To edit a previously made template click on the
pencil under the Action label and it will bring you back into the template to make any revisions.

E-mail Settings
To add a CC Email Address, Reply To Address, From Address to E-mail Templates
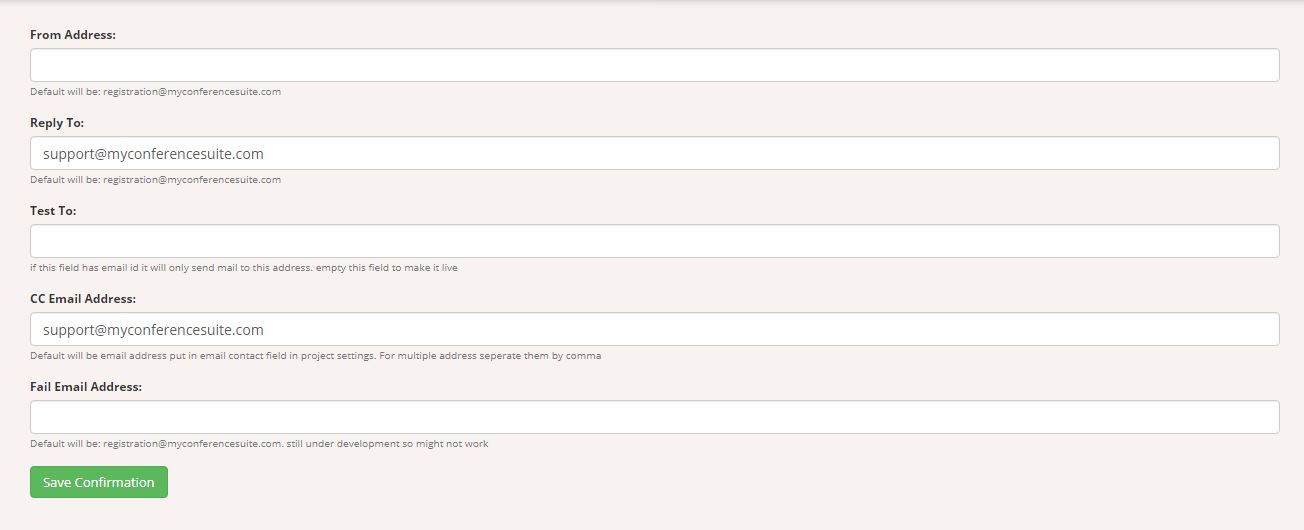
- On the Master Menu click {Email} {Settings} and enter e-mail addresses in the appropriate areas.
- From Address is defaulted to be registration@myconferencesuite.com but if you would like it to show being sent from another e-mail you can
enter it here
- CC will be sent the e-mail confirmation of everyone who registers
- Reply To is who will be reached when a registrant replies to an email
- Click Save Confirmation

 MYCONFERENCE SUITE
 MYCONFERENCE SUITE