
Help Section
Creating a Registration Form
Creating a registration form allows you to gather essential information from your users. Follow these steps to create a registration form with both pre-built and custom fields.
Step-by-Step Guide
1. Navigate to the Project Level
Ensure you are at the project level within your dashboard (i.e., inside a project).
2. Access the Form Builder
From the left sidebar, click on Registration -> Fields -> Builder.
Adding Fields to the Registration Form
You have two options for adding fields to your registration form:
- Pre-built Fields
- Custom Fields
1. Pre-built Fields
View Pre-built Fields
From the right sidebar, click on Module. A list of modules will appear.
Select Fields from a Module
Click on the 'eye' icon next to the desired module to view its pre-built fields. For example, click on the 'eye' icon for Basic Contact Information.
Add Fields to the Registration Form
In the popup, select the fields you wish to add to the registration form. Click on Add to project. The selected fields will be added to the registration form.
2. Custom Fields
View Custom Field Options
From the right sidebar, click on Field to view available custom field options.
Add Custom Fields to the Registration Form
Click on the custom field that meets your requirements to add it to the registration form. Note: New custom fields are added to the bottom of the page by default.
Summary
By following these steps, you can create a comprehensive registration form tailored to your specific needs, using both pre-built and custom fields. This ensures you gather all necessary information from your users efficiently. If you have any questions or need further assistance, please refer to our support resources or contact our support team.
Cloning an Event
Cloning an event allows you to easily replicate an existing project with all its settings and configurations. Follow these steps to clone an event:
Step-by-Step Guide
1. Navigate to the Client's Project Page
Once you are logged into your account, go to the client's project page.
2. Access the Clone Feature
From the left sidebar, click on 'Clone' located under the Projects section.
3. Fill Out Event Details
A form will appear prompting you to fill out the new event's details.
- Languages: Select the languages for the event.
- Name: Enter the name of the event.
- Date and Time: Specify the date and time for the event.
After filling out the necessary details, click on 'Continue'.
4. Select the Project to Clone
A dropdown menu labeled 'Pick a project' will appear. Select the project you wish to clone from this dropdown.
5. Choose What to Exclude (Optional)
During this step, you have the option to exclude certain elements from the clone:
- Registration Form Fields
- Project Settings
- Coupon Codes
Check the options for the elements you want to exclude.
6. Complete the Cloning Process
After making your selections, click on 'Continue'. You will be redirected to the Field Builder page, indicating that the project has been successfully cloned.
Summary
By following these steps, you can efficiently clone an existing event, saving time and ensuring consistency across your projects. If you encounter any issues during the cloning process, please contact support for further assistance.
Adding Fees to Your Fields
Adding fees to your registration form fields enables you to charge users based on their selections. This guide explains how to add fees to fields such as radio buttons, dropdowns, or checkboxes.
Step-by-Step Guide
1. Add Your Desired Field
Choose a field type (e.g., radio, dropdown, checkbox) and add it to your registration form. Enter a title for the field (e.g., "Membership Type").
2. Enter Values for the Field
Go to the Values tab and add the values for this field (e.g., "Member," "Non-Member").
3. Access the Options Tab
Click on the Options tab. Check the box labeled "Is this a payable field" to indicate that this field will have an associated fee.
4. Configure Fee Options
You have several options to choose from:
- Option Has Fee: Allows you to associate a single fee with a value.
- Option Has Multiplier: Multiplies the cost associated with the value (useful for ticketing).
- Option Has Fees: Allows you to associate multiple fees with a value (e.g., an Early Bird rate).
5. Save Changes
Click Save Changes and go back to edit the field. You will now notice a $ sign under the values in the field.
6. Set Up Fee Settings
Click on the $ sign to open the Fee Settings. Here, you can:
- Add an Early Bird Fee and set its timeframe by dragging the box to the appropriate date on the timeline.
- Set the Regular Fee, which will be applied after the Early Bird date passes.
7. Option Has Multiplier (If Selected)
If you selected Option Has Multiplier, the fee entered will be multiplied by the number of items or tickets selected by the user.
Summary
By following these steps, you can add fees to fields in your registration form, allowing for different pricing options such as member rates, early bird discounts, and ticket multipliers. This flexibility helps in setting up a dynamic and user-friendly payment system. If you need additional assistance or have questions, please refer to our support resources or contact our support team.
Setting Capacities in an Event
There are multiple ways to set capacities within your event, whether for the total number of registrants or specific registration fields. Follow these steps to ensure you set the appropriate limits.
Step-by-Step Guide
1. Setting a Capacity for Total Registrants
Step 1: Access the Registration Settings
From the left-hand master menu, click on
Registration -> Settings.
Step 2: Set the Maximum Registrants
In the Max Registrations field, specify the maximum number of registrants allowed for the event.
Enter the number in digits (e.g., 100, 500, etc.).
Step 3: Save the Changes
Ensure you save the changes so the registration limit is enforced.
2. Setting a Capacity on a Registration Field
Step 1: Access the Field Builder
From the left-hand master menu, click on
Fields -> Builder.
Step 2: Edit the Desired Field
Locate the field you want to set a capacity on and click the Pencil icon to edit the field.
Step 3: Set Capacity for the Entire Field
Click on Advanced Edit for the field.
In the General Settings Options, enter the desired capacity for the field.
Step 4: Set Capacity for Specific Values (Optional)
If you want to set a capacity for specific values within the field (e.g., for a dropdown or multiple-choice field), follow these steps:
- Click on Advanced Edit for the specific value.
- In General Settings Options, input the capacity for that value.
Summary
By setting capacities, you can control the number of total registrants as well as limit availability for specific registration fields or values. This ensures proper event management and prevents over-registration. If you have any questions or need further assistance, please refer to our support resources or contact our support team.
Creating Conditions for Registration Fields
Conditions allow you to dynamically control the behavior of fields based on user input. This guide walks you through creating conditions to show, hide, or require fields based on specific criteria.
Step-by-Step Guide
1. Access the Field Builder
From the left-hand master menu, click on
Registration -> Fields -> Builder.
2. Navigate to the Conditions Page
On the Conditions page, click on the + Add Conditions button. A new blank condition will now appear.
3. Understanding the Components of a Condition
Each condition is composed of several elements:
- Field Controlling the Condition: Select the field that will trigger the condition.
- Logical Operator: Choose the operator for the condition:
- IS: When the field value matches the condition.
- IS NOT: When the field value does not match the condition.
- Field Value: Specify the value that the condition will check against.
- Add Button: Use this button to add more conditions. You can combine multiple conditions with AND or OR operators.
4. Define the Action to be Taken
Choose what action to take when the condition is met:
- Show: Hide the field until the condition is met, then show it.
- Hide: Show the field initially, but hide it when the condition is met.
- Make Required: Make the field mandatory once the condition is met.
5. Specify the Field to Apply the Action To
Select the field to which the action will be applied.
6. Select Field Values to Apply the Action To (Optional)
By default, the condition applies to all field values, but you can select specific values:
- Click on one value to highlight it.
- Shift-Click: Select multiple adjacent field values.
- Ctrl-Click: Select multiple non-adjacent field values.
7. Save the Conditions
Once your conditions are set up, click on Save Conditions. The changes will take effect on your live registration form.
Example Scenario
For example, you might want to show additional fields if the user selects "Non-Member" from a membership type dropdown. You would set the condition:
- Field: Membership Type
- Operator: IS
- Value: Non-Member
- Action: Show
- Field to Apply Action To: Additional Registration Information
Summary
Conditions provide a powerful way to control how and when certain fields are displayed or required based on user inputs. Follow these steps to dynamically manage your form fields, enhancing the user experience. If you have any questions or need further assistance, please refer to our support resources or contact our support team.
Adding a Coupon Code to Your Event
Coupon codes allow you to offer discounts for registrants. This guide walks you through the steps to create a coupon code with various settings.
Step-by-Step Guide
1. Navigate to the Coupon Section
From the left-hand master menu, click on
Project -> Finance -> Coupons. Click on
+ New Coupon to create a new coupon code.
2. Coupon Code and Name
Coupon Code: Enter the code that users will input (e.g.,
SAVE30).
Coupon Name: Enter the same name as the coupon code for
consistency.
3. Set Start & End Dates (Optional)
If you want the coupon to only be active for a certain time period, enter the start and end dates. If not, leave these fields blank for the coupon to remain active indefinitely.
4. Set Maximum Allowable Uses
In the Maximum Allowable field, enter how many times this coupon can be used by registrants (e.g., limit to 100 uses).
5. Select Calculation Type
Choose the type of discount you want to offer:
- Dollar: Deducts a flat dollar amount from the ticket total (e.g., $3 off).
- Percentage: Applies a percentage discount to the ticket total (e.g., 30% off).
- Rate: Replaces the normal registration rate with the discounted rate.
6. Enter Basic Amount
Enter the discount amount in digits only (e.g., 3.00 or
30). Do not use symbols like $ or %.
7. Tax on Discount
Choose whether to apply tax to the discount amount. The default is Yes (tax will be applied).
8. Coupon Combinations
Coupon combined with other coupons: Select Yes if this coupon can be combined with other coupons during registration.
9. Applicability for Returning Registrants
Coupon applicable for returning registrant: Select Yes if the coupon should be reapplied for returning users, or No if the coupon can only be used once.
10. Discount for Group Registrations
If the coupon applies to group registrations, specify the number of registrants required to use the discount.
11. Coupon Availability by Registrants
Enter the number of registrants who can use this coupon if there's a limit. Once reached, the coupon will no longer be valid.
12. Apply Discount According to
Choose whether the discount should be applied to the subtotal or the registration order. This is necessary if you’ve added minimum or limited registrant conditions.
13. Automatic Application of Coupon
Do you want to apply this coupon automatically? Select Yes to apply it automatically during registration, or No for the user to input the code manually.
14. Select Usage Type
General (Apply to all): The coupon will apply to all
registration types.
Specific: This will display a list of registration types with
checkboxes. Select specific types for which the coupon can be applied (e.g.,
Member, Non-Member).
15. Save the Coupon
Once all settings are configured, click Save to finalize the coupon code.
Summary
By following these steps, you can easily create and manage coupon codes for your event, offering discounts based on dollar amounts, percentages, or specific rates. Coupons can be customized for individual or group registrations, and you can set time limits and usage restrictions to ensure proper control over your discounts. For more assistance, feel free to refer to our support resources or contact the support team.
Adding Content to the Landing Page
To update or add new content to your landing page, follow these simple steps:
Step-by-Step Guide
1. Navigate to Project Settings
From the left sidebar, click on Project ->
Project Settings.
2. Access Project Elements
In the Project Settings menu, select Project Elements from the list of available options.
3. Locate the Body Element
Scroll through the list of elements and find the one labeled body.
4. Edit the Body Element
Under the Actions column, click the icon next to the body element to open the editor.
5. Make Changes in the Editor
Add or edit the content as needed within the editor. This could include text, images, or other media for your landing page.
6. Save Changes
Once you've completed your updates, click Save Changes to apply the modifications to your live landing page.
Summary
By following these steps, you can efficiently add or update content on your landing page. Make sure to save your changes to ensure they reflect on the live site. For more assistance or advanced options, feel free to contact support.
Creating a Menu
Follow these steps to create a menu for your project:
Step-by-Step Guide
1. Navigate to Project Settings
From the left sidebar, click on Project ->
Project Settings.
2. Access Project Navigation
In the Project Settings menu, select Project Navigation from the list.
3. Add a New Menu
Click on Add Menu.
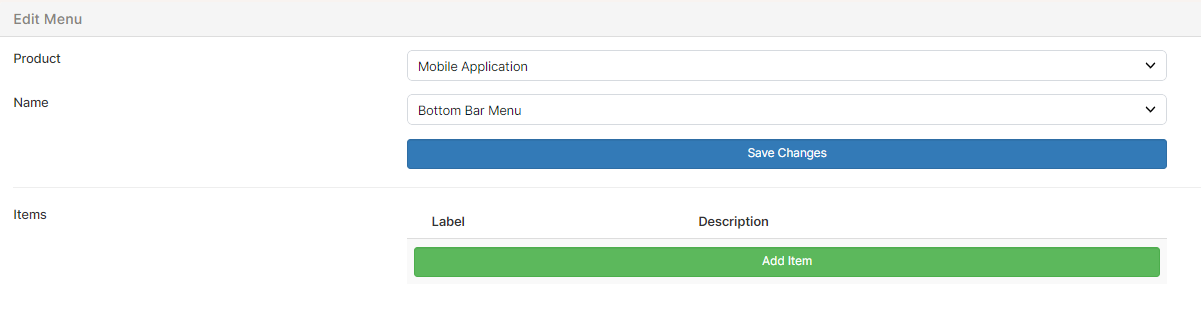
4. Select Product and Name the Menu
Choose the product where you want your menu to display. Enter a name for the menu.
5. Select the Menu from the Dropdown
Once the menu is added, select it from the dropdown list.
6. Add Menu Items
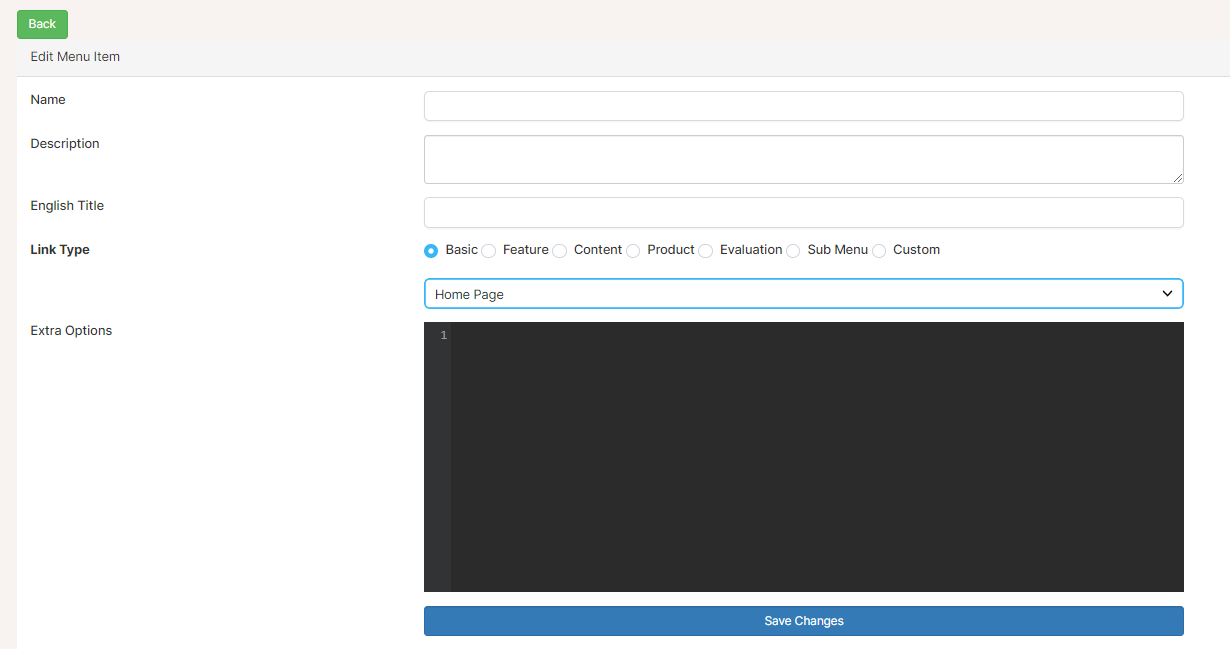
Click on Add Menu Item. Enter the details for the new menu item (e.g., name, link, etc.).
7. Save the Menu Item
After adding the details, click Save to add the menu item to your menu.
Summary
By following these steps, you can easily create a menu and add items to it for your project. Ensure to save your changes to make the menu functional. For further assistance, feel free to reach out to our support team.
Adding New Registrants & Payment
To add new registrants and process their payments, follow these steps:
Step-by-Step Guide
1. Navigate to the Registrant Section
From the left-hand side of the master menu, click on
Registration -> Registrants ->
Add Registrant.
2. Fill Out Registrant Information
Complete all the required fields with the registrant’s details. Click Create once all information is entered.
3. Locate the Newly Added Registrant
You will be taken back to the compiled listing of all registrants. Use the search bar to find the registrant you have just added by name or email.
4. Generate an Invoice
Once you locate the registrant, click on the Action button next to their name. From the dropdown, click Invoice to generate the invoice.
5. Make a Payment
On the right side of the invoice page, click the blue Make a Payment button.
6. Email Confirmation (Optional)
If you want the registrant to receive an email confirmation, check the box labeled Send Email Confirmation Upon Successful Transaction.
7. Select Payment Method
Scroll down to select the appropriate Method of Payment (e.g., credit card, bank transfer). Fill out the payment details accordingly.
8. Process the Payment
Once all the payment information is complete, click Process to finalize the transaction.
Summary
By following these steps, you can add new registrants, generate invoices, and process payments seamlessly. Make sure to review the payment details before processing and, if necessary, send the registrant a confirmation email upon successful payment. For further assistance, please reach out to support.
Editing Registrant Information
If you need to edit a registrant’s information, follow these steps:
Step-by-Step Guide
1. Navigate to Registrants Section
From the dashboard, go to the left-hand master menu and
click on Registrants.
2. Registrant Categories
Under the Registrants section, you will find three categories:
- Active: Completed registrations.
- Incomplete: People who started the registration process but did not complete it.
- Cancelled: Registrants who canceled their registration.
3. Access Active Registrants
To edit a registrant's information, click on Active to view the list of all completed registrations for the event.
4. Search for a Specific Registrant
You can search for a specific registrant by entering their name, company, or registrant key in the search bar located at the top right.
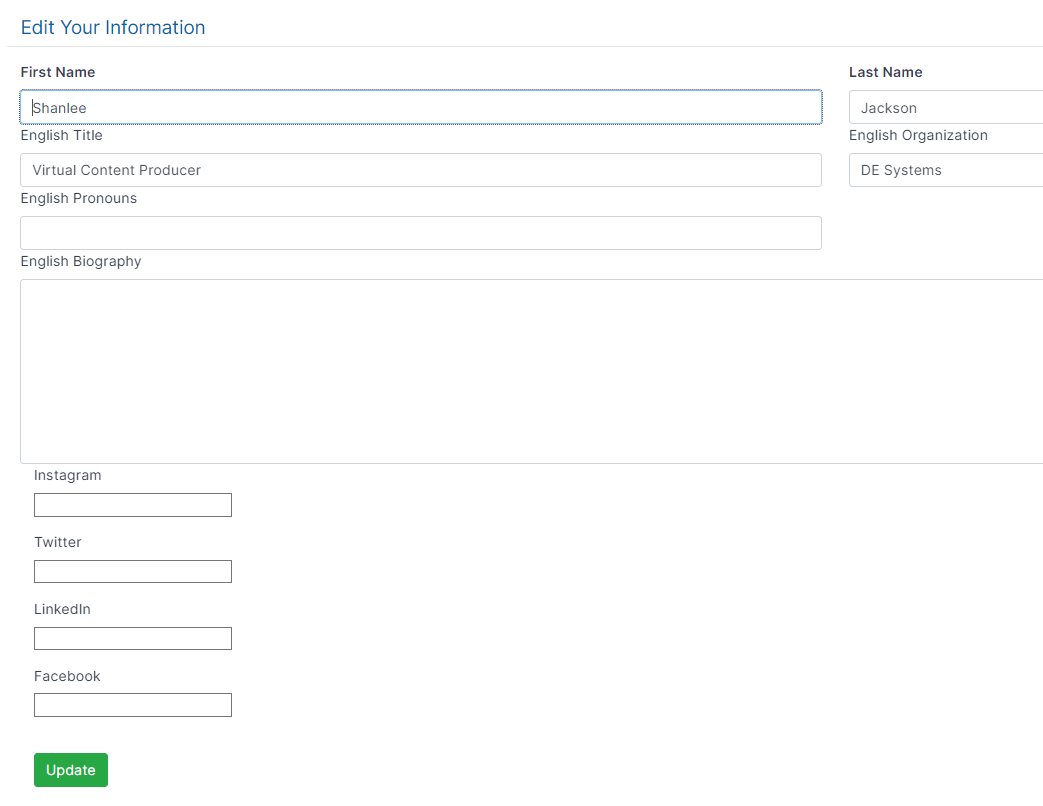
5. Edit Registrant Information
To make edits, click the gear icon beside the registrant's name. From the dropdown, select View/Edit to open the registrant’s details.
6. Edit Registrant Fields
All fields from the registration form will be displayed,
allowing you to edit any information, including selected registration
fees.
Note: Changes to registration fees will impact their invoice (e.g.,
adding tickets will show a balance due, while removing paid items will result in
a refund being owed).
7. Additional Options
On the right-hand side of the page, you can:
- View payment information.
- Re-send the confirmation email.
- Access registration links.
- Re-print their badge (if badge printing is set up).
8. Save Changes
Once you have completed your edits, be sure to click Update at the bottom of the page to save the changes.
Summary
By following these steps, you can easily edit any registrant’s information, adjust their registration fees, and manage their invoice. Make sure to double-check all changes before saving to avoid any discrepancies. For additional support, feel free to reach out.
Adding New Registrants & Payment
Follow these steps to add a new registrant and process their payment:
Step-by-Step Guide
1. Navigate to Registrants Section
From the left-hand side of the master menu, click
Registration -> Registrants -> Active.
2. Add a New Registrant
Scroll to the bottom of the page and click + Add Registrant.
3. Fill Out Registrant Information
Complete all the required fields with the registrant’s details. Once all the information is filled in, click Create.
4. Find the New Registrant
You will be taken back to the list of all registrants. Use the search bar at the top to find the registrant you just added.
5. Generate an Invoice
Once you locate the registrant, click the Action button next to their name. Select Invoice to generate the invoice for that registrant.
6. Process the Payment
On the right side of the invoice page, click the blue Make a Payment button.
7. Email Confirmation (Optional)
If you want the registrant to receive a payment confirmation email, check the option Send Email Confirmation Upon Successful Transaction.
8. Select Payment Method
Scroll down and choose the appropriate Method of Payment (e.g., credit card, bank transfer). Enter the payment details as needed.
9. Complete the Payment
Once everything is ready, click Process to finalize the payment.
Summary
By following these steps, you can seamlessly add a new registrant, generate an invoice, and process payments. Ensure all payment details are accurate before processing and, if needed, send a confirmation email to the registrant. For additional support, please reach out to our help desk.
Issuing a Refund
Follow these steps to issue a refund for a registrant:
Step-by-Step Guide
1. Navigate to the Registrants Section
From the left-hand side of the Master Menu, click
Registration -> Registrants -> Active.
2. Search for the Registrant
Use the search bar at the top right to find the registrant you need to refund by their name, company, or registrant key.
3. Access the Invoice
Right-click on the Action button next to the registrant's name. Select Invoice to open the invoice for the registrant.
4. Identify Refund Owing
If the registrant has an amount that needs to be refunded, a red bar will appear at the top of the page indicating that a refund is due. Click on the "here" link in the red bar.
5. Process the Refund
A pop-up will appear showing the refund amount and the transaction ID. Confirm the details and process the refund.
Adding a Refund to an Invoice
If you need to add a refund directly to an invoice, follow these steps:
Step-by-Step Guide
1. View Completed Transactions
Scroll to the bottom of the invoice page where you can see the list of completed transactions.
2. Initiate the Refund
Click the Option button next to the relevant transaction. From the dropdown, click Refund.
3. Select Refund Type
A pop-up window will appear with the option to issue either a Full Refund or a Partial Refund (you can adjust the amount here).
4. Complete the Refund
After selecting the appropriate refund type, click the Refund button to process the transaction.
Summary
With this guide, you can easily issue a full or partial refund. Make sure to review all transaction details carefully before processing. For any issues or further questions, feel free to contact support.
Project Reports
From the left sidebar, navigate to Registration -> Reports -> Project Reports:
Step-by-Step Guide
1. Access Registration Fields
On the right-hand side of the Project Reports page, all the registration fields from your form will be listed. These fields are divided into two categories:
- Active Fields: Fields currently displayed in the report.
- Inactive Fields: Fields not displayed in the report.
2. Activating Inactive Fields
To include inactive fields in the report, click the checkbox next to the field you wish to activate. A pop-up will appear asking for confirmation to move the field to the active report list. Confirm your choice.
3. Viewing a Field’s Report
To view the report for a specific field, hover over the field's name until it underlines, then left-click on it. A report will be generated displaying:
- A graph at the top of the page visually representing the field’s data.
- Individual listed information below the graph, showing data points for the selected field.
4. Interactive Graph Insights
Hover your mouse over different sections of the graph to see detailed insights, such as the number of registrants in specific categories (e.g., Members, Non-Members, etc.).
5. Exporting the Report
To export the report, click the blue Export button at the top right of the page. The report will be downloaded as an Excel file with all active fields and data included.
6. Show/Hide Fields
Below the graph, you can select or deselect fields to show or hide them in the report by clicking on the grey Show/Hide button. Only displayed fields will be included in the report.
7. Excel Export
To export the customized report with only the displayed fields, click the grey Excel button. Hidden fields will be excluded from the export.
Summary
Using the Project Reports feature, you can generate comprehensive reports, visualize data with graphs, and export it for analysis. Customize reports by selecting relevant fields, and only export what you need. For further assistance, feel free to contact support.
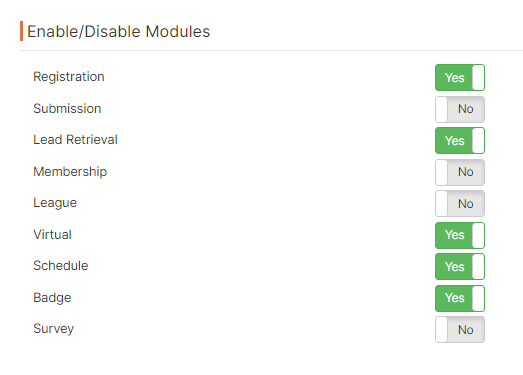
Virtual Portal - Setup
Create the portal and activate the settings you wish to use.
-
In PROJECT SETTINGS, enable the modules you will use. For the Virtual Portal and Mobile
App,
you will need to activate the SCHEDULE and VIRTUAL.
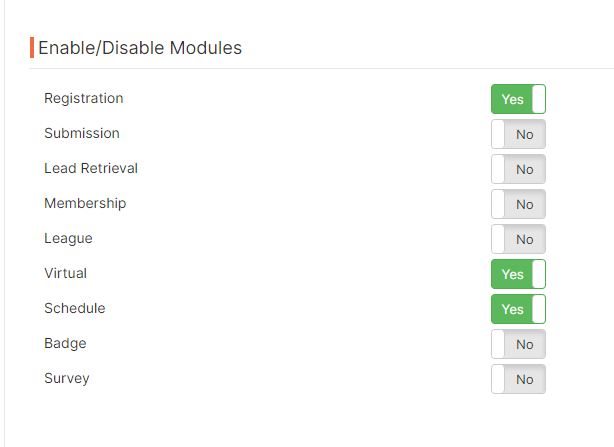
- Once VIRTUAL PORTAL and SCHEDULE are enabled, go to the Virtual Portal section and click on SETTINGS.
- This is the area where you set your Virtual Portal Settings.
- ENABLE VIRTUAL PORTAL > YES
- Activity reminders (via email to attendees)
- Timezone of the event.
- Sidebar (This area is connected to the Mobile App as well and appears on every page of the portal on the right-hand side).
- Sponsor levels can be set here and assigned in the SPONSORS area.
-
Shopping Cart (buy on-demand within the portal).

Virtual Portal - Menu
-
Virtual Portal > USERS > LIST
-
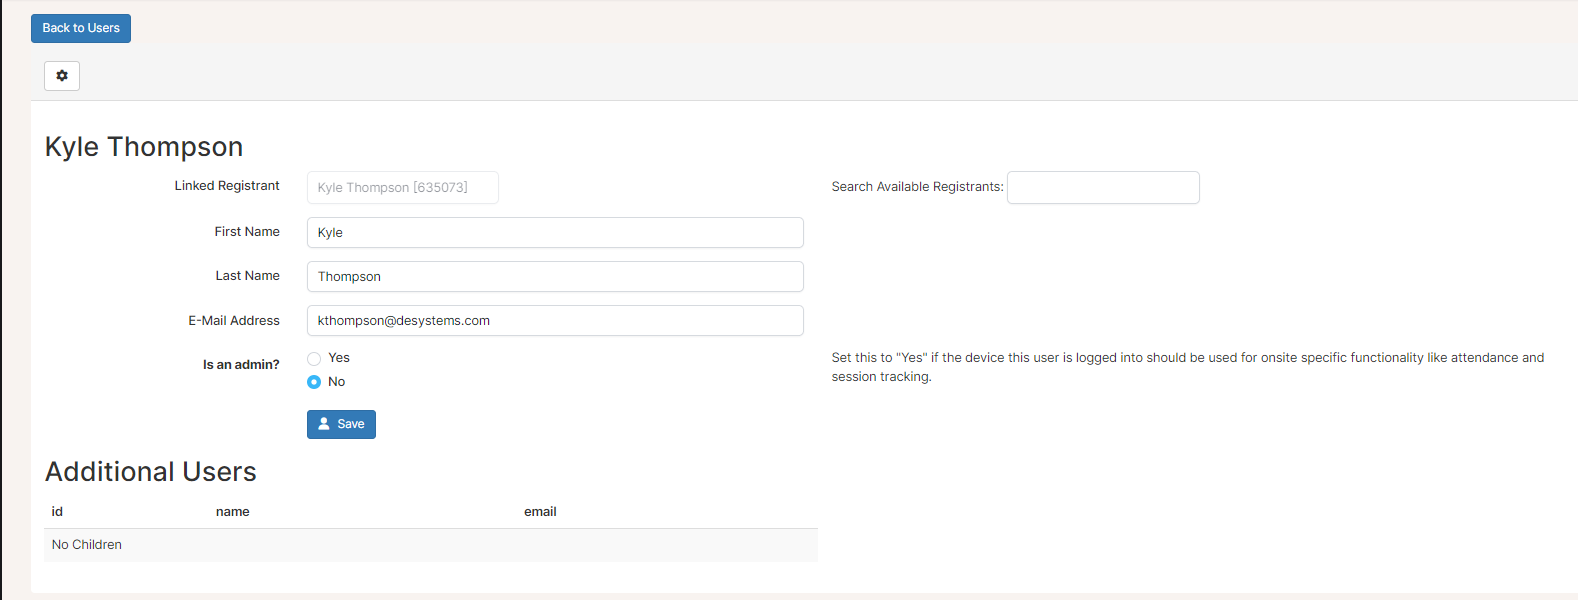
This is the USER LIST for your Virtual and Mobile App login. If a registrant has changed any name or
email
information in the registration area, you will need to manually change this content in the USER
LIST. This is
also where you can manually add content to a specific user.
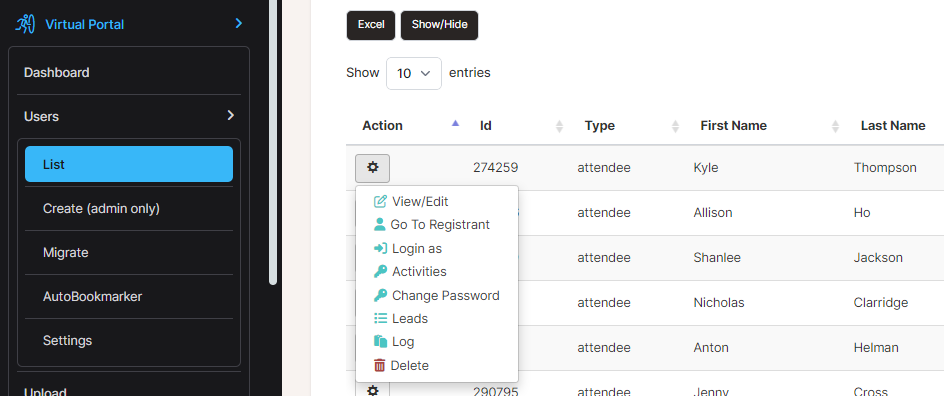
- Click on View/Edit: This tells you what registration record this user is linked to, as well as the first name, last name, and email address.
-
This is the area in which you can make any USER an ADMIN for the Mobile App.
ADMIN gives the user and their device the ability to SCAN for attendance or session
tracking.
-
This is the USER LIST for your Virtual and Mobile App login. If a registrant has changed any name or
email
information in the registration area, you will need to manually change this content in the USER
LIST. This is
also where you can manually add content to a specific user.
-
Virtual Portal > USERS > Settings
- In this section, you can manually adjust notifications for users.
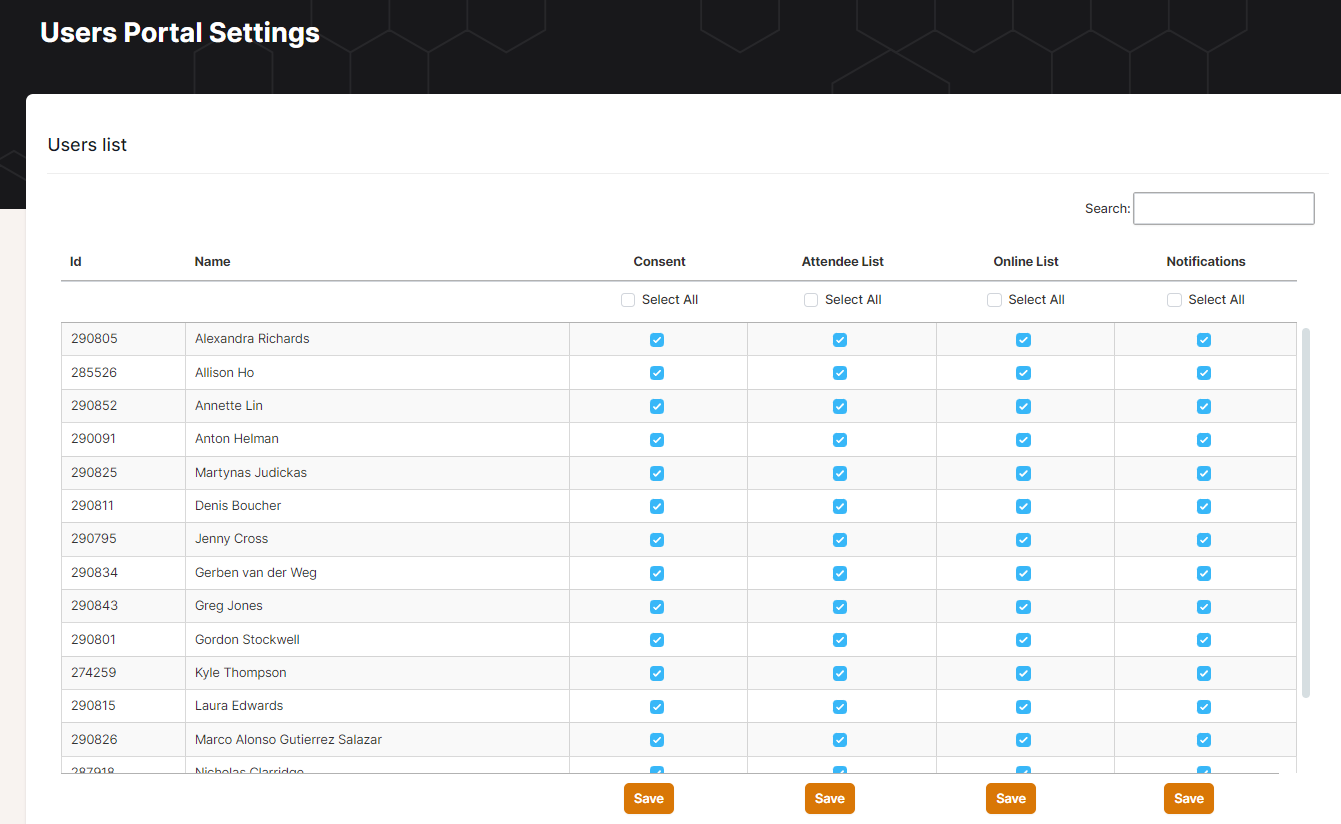
- In this section, you can manually adjust notifications for users.
-
Virtual Portal > Upload
- This is where you can upload all files and images to support the event.
-
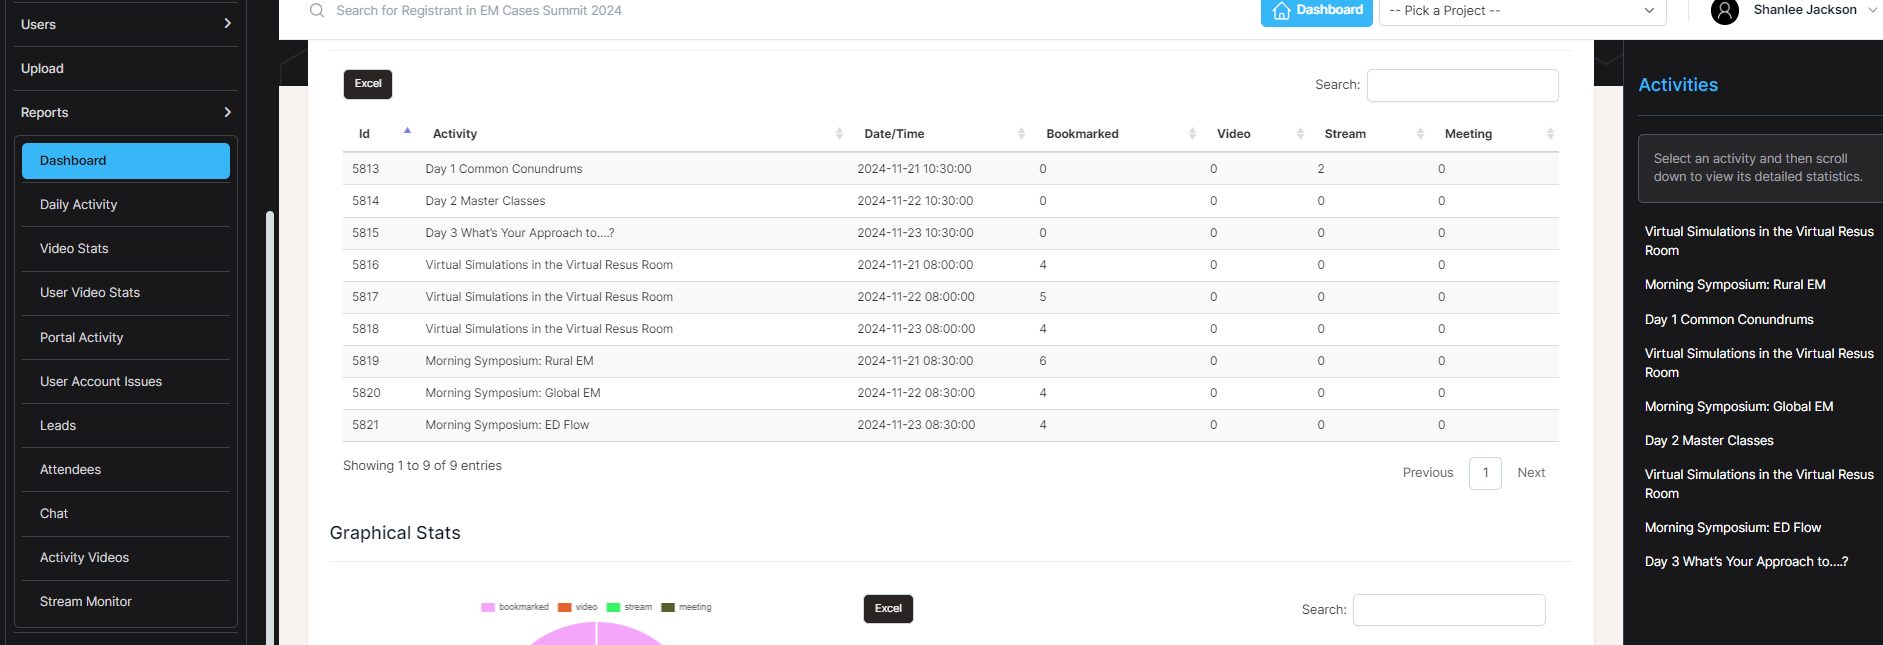
Virtual Portal > Reports
-
There are a variety of reports to support the Virtual Portal activity, including User statistics,
Video and Streaming reports, Chat reports, and more.
-
There are a variety of reports to support the Virtual Portal activity, including User statistics,
Video and Streaming reports, Chat reports, and more.
-
Virtual Portal > Moderate
- In this area, you can modify any post on the Sidebar General Chat, Q&A, or Social Feed. This is also connected to the Mobile App for editing any post in the social feed.
Creating the Virtual Portal Top Menu and Content Menu Items
-
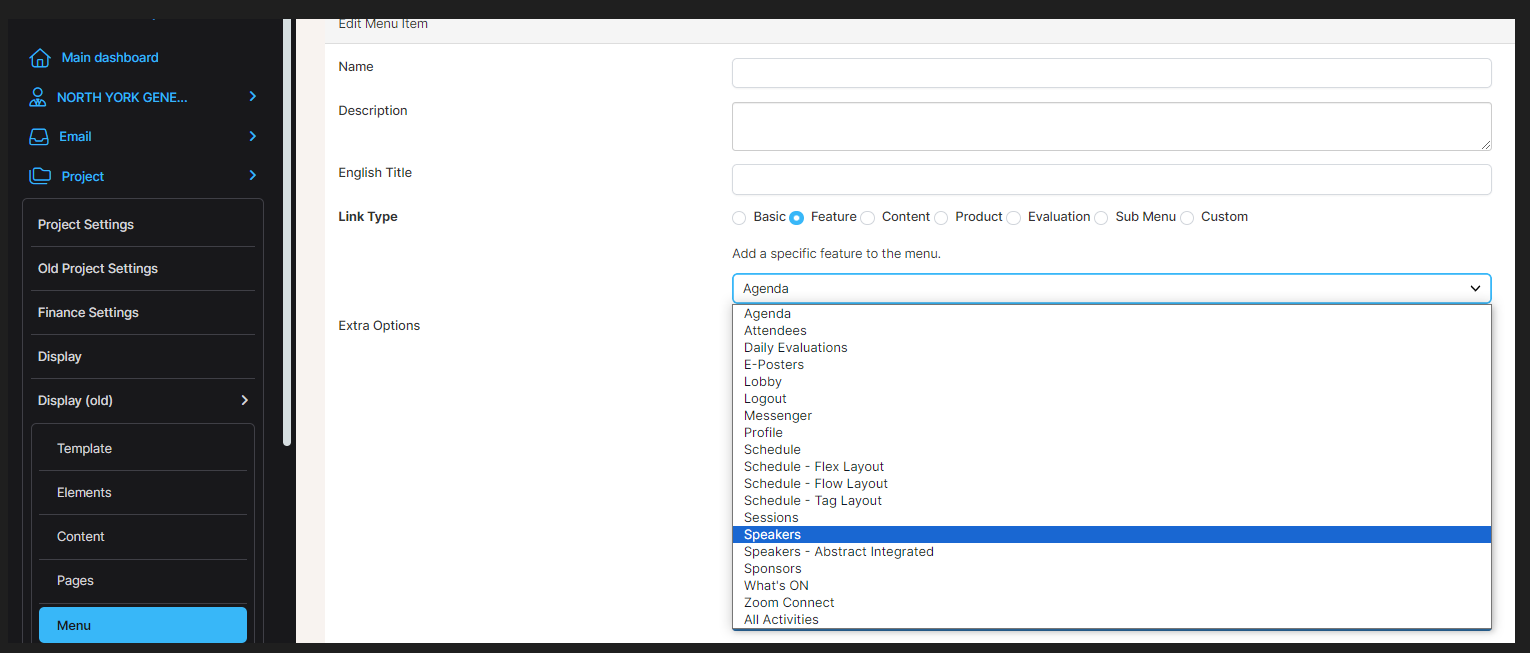
Project > Project Settings > Display (old) > Menu
-
This is where you create the navigation menu items for any of our products, including Registration,
Mobile App, and Virtual Portal.
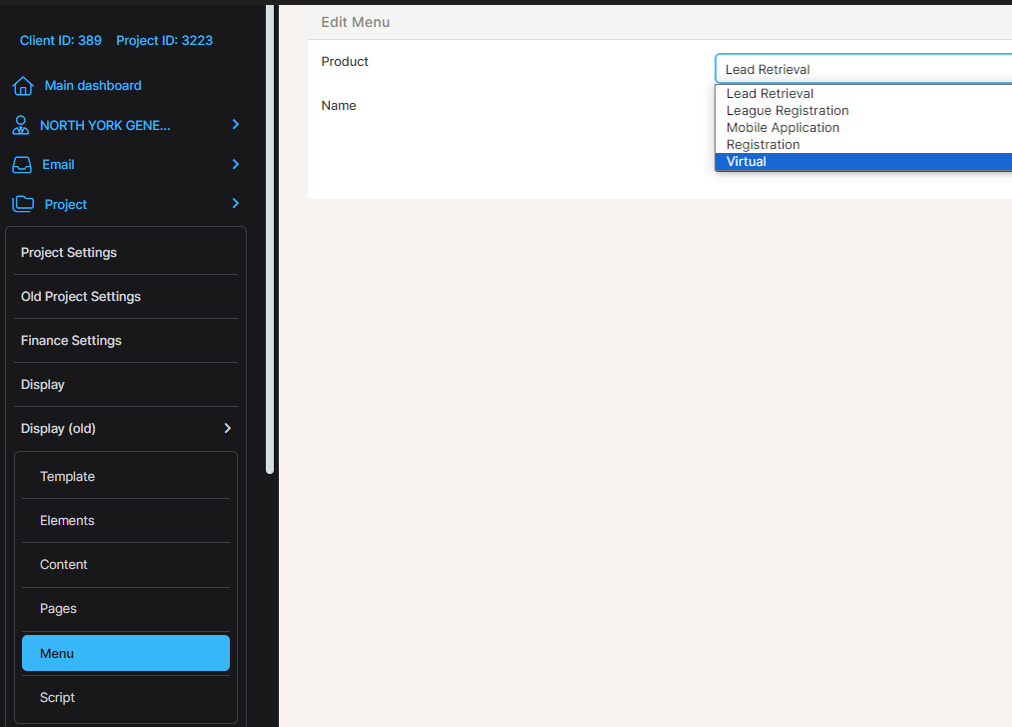
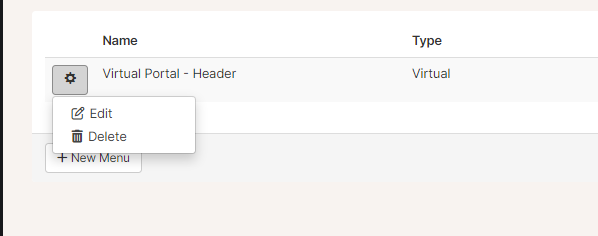
-
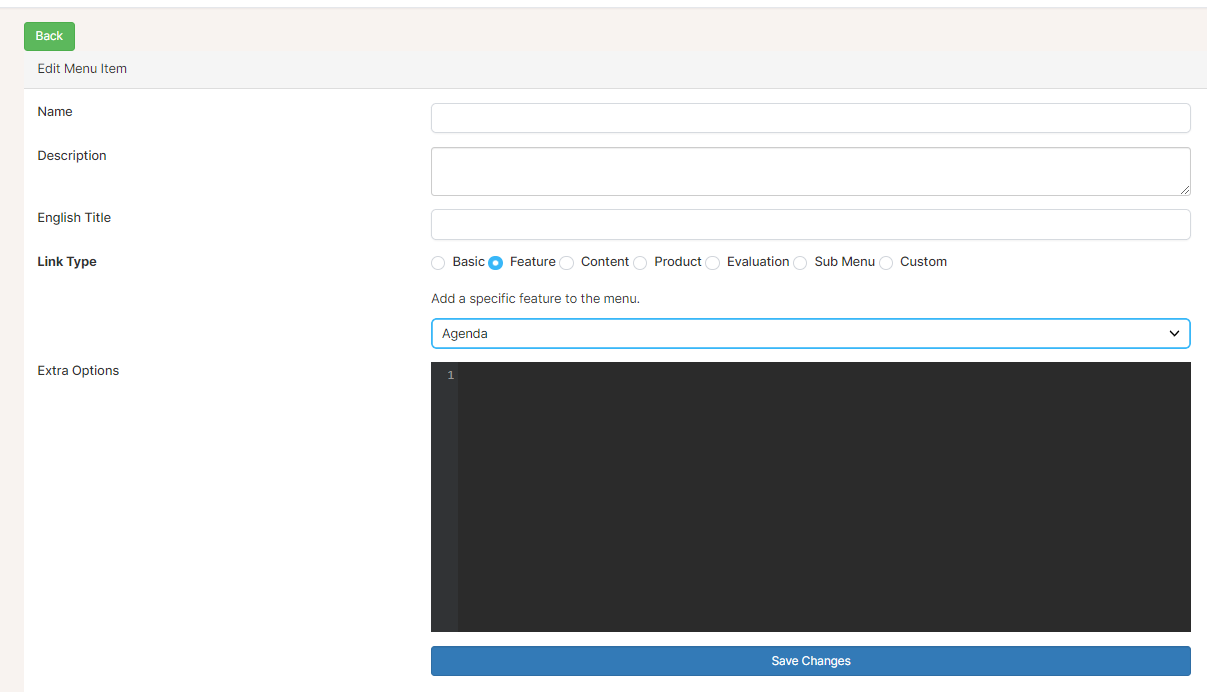
Click Edit > Add Item.
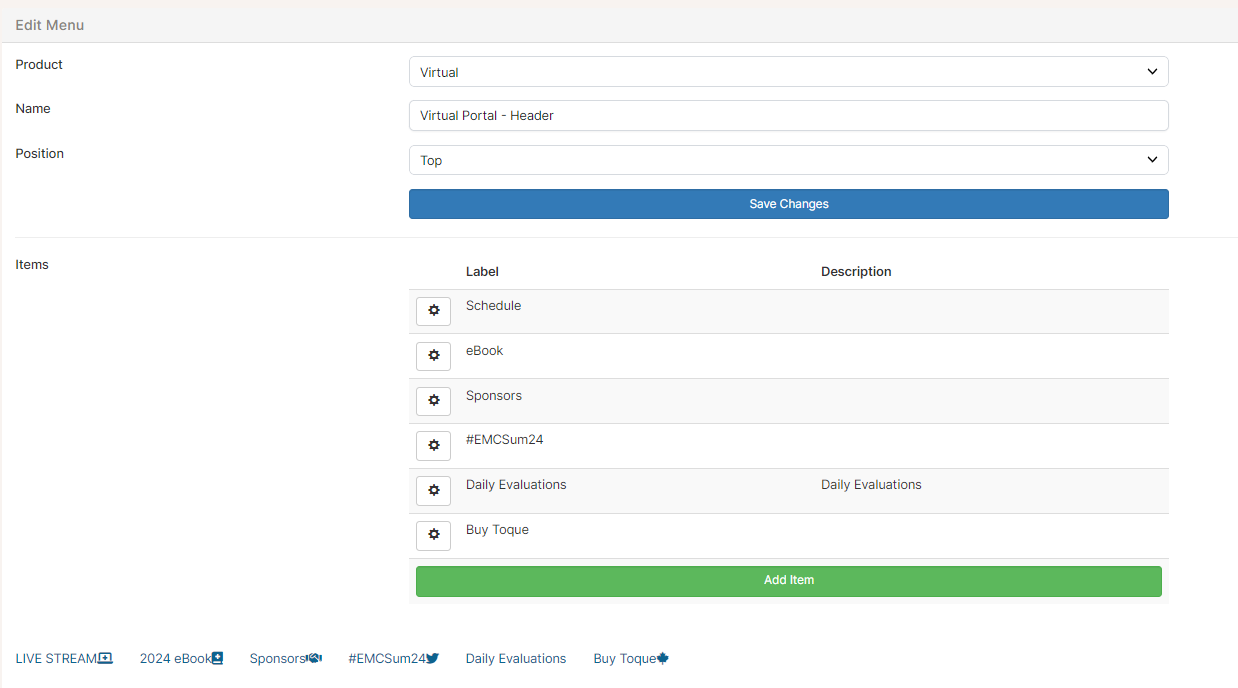
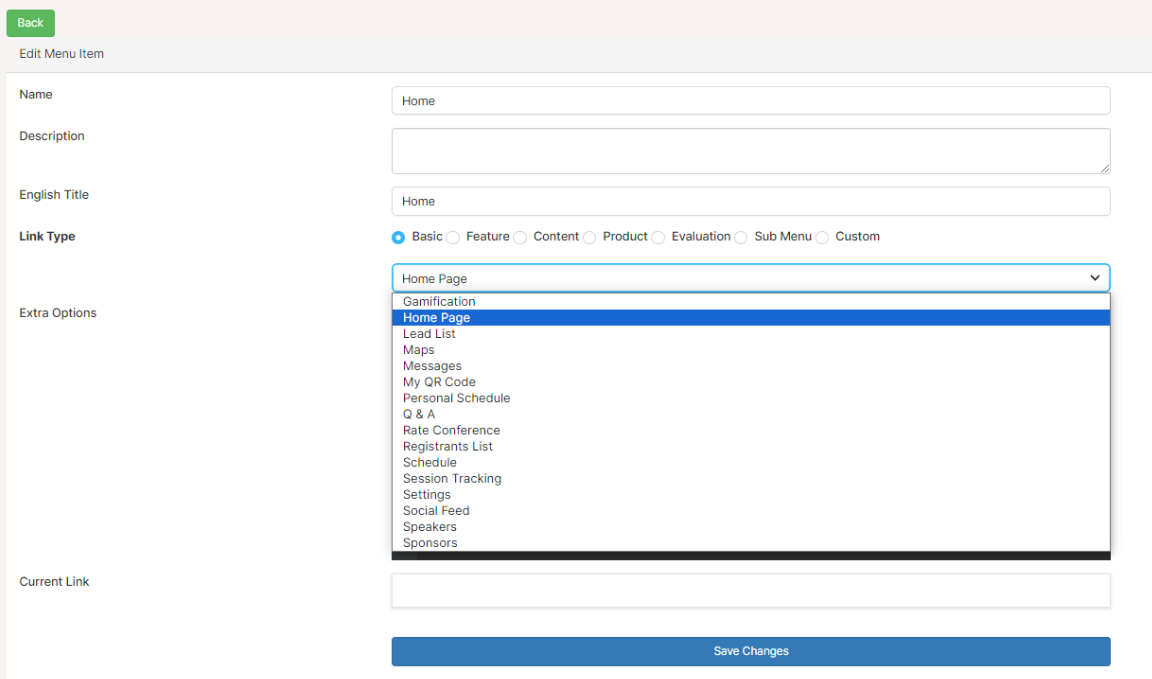
-
Many of the standard menu items can be found under the FEATURE section of this
area. This is also where you can link to a URL, another menu item, etc.
-
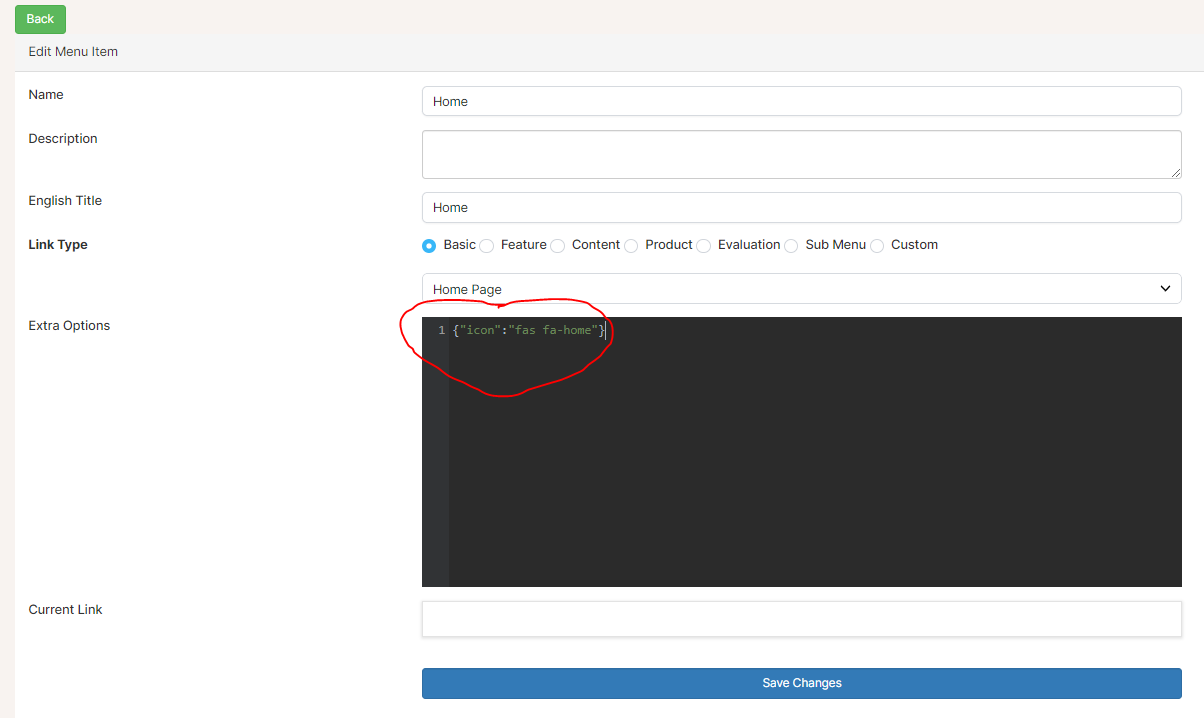
Once you have created the LINK TYPE, you need to:
- Create the TITLE in both French and English.
- Add the ICON.
-
To set the menu icons, visit
FontAwesome
and select your desired icon. Add it to the options in the following format:
{"icon":"fas fa-home"}.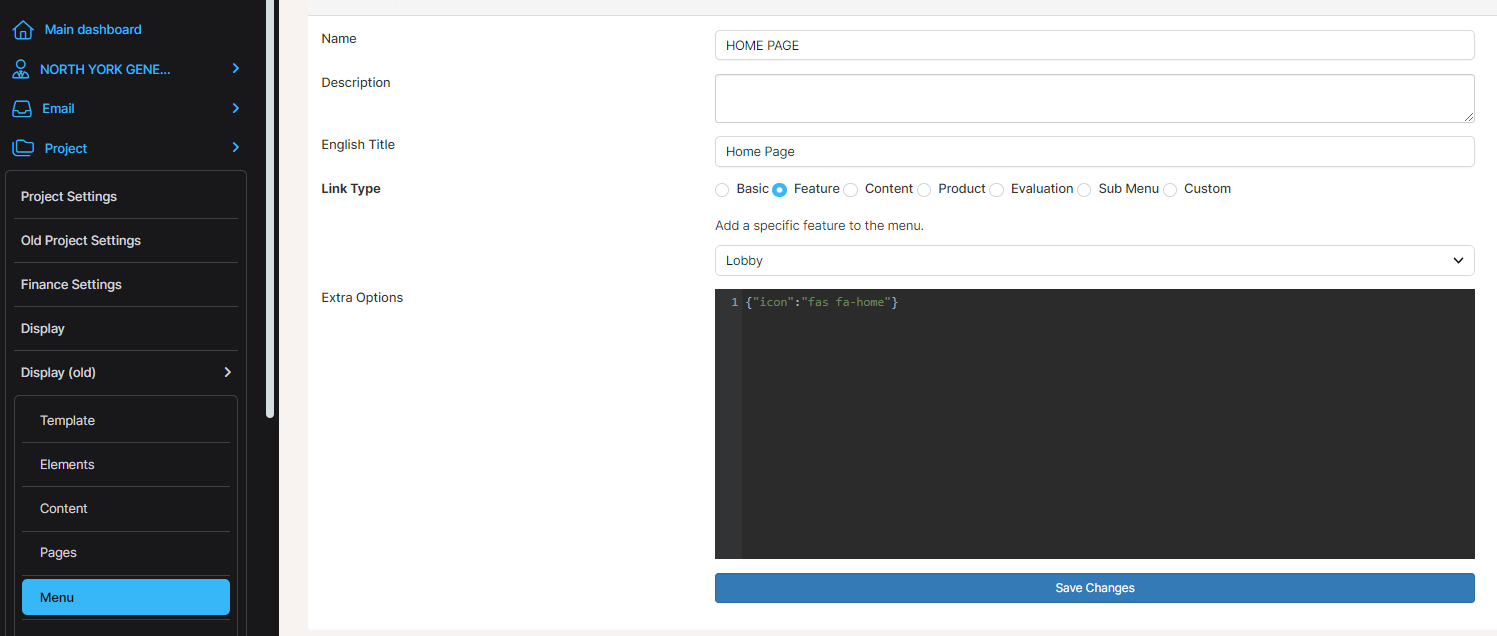
-
This is where you create the navigation menu items for any of our products, including Registration,
Mobile App, and Virtual Portal.
Virtual Portal - Schedule
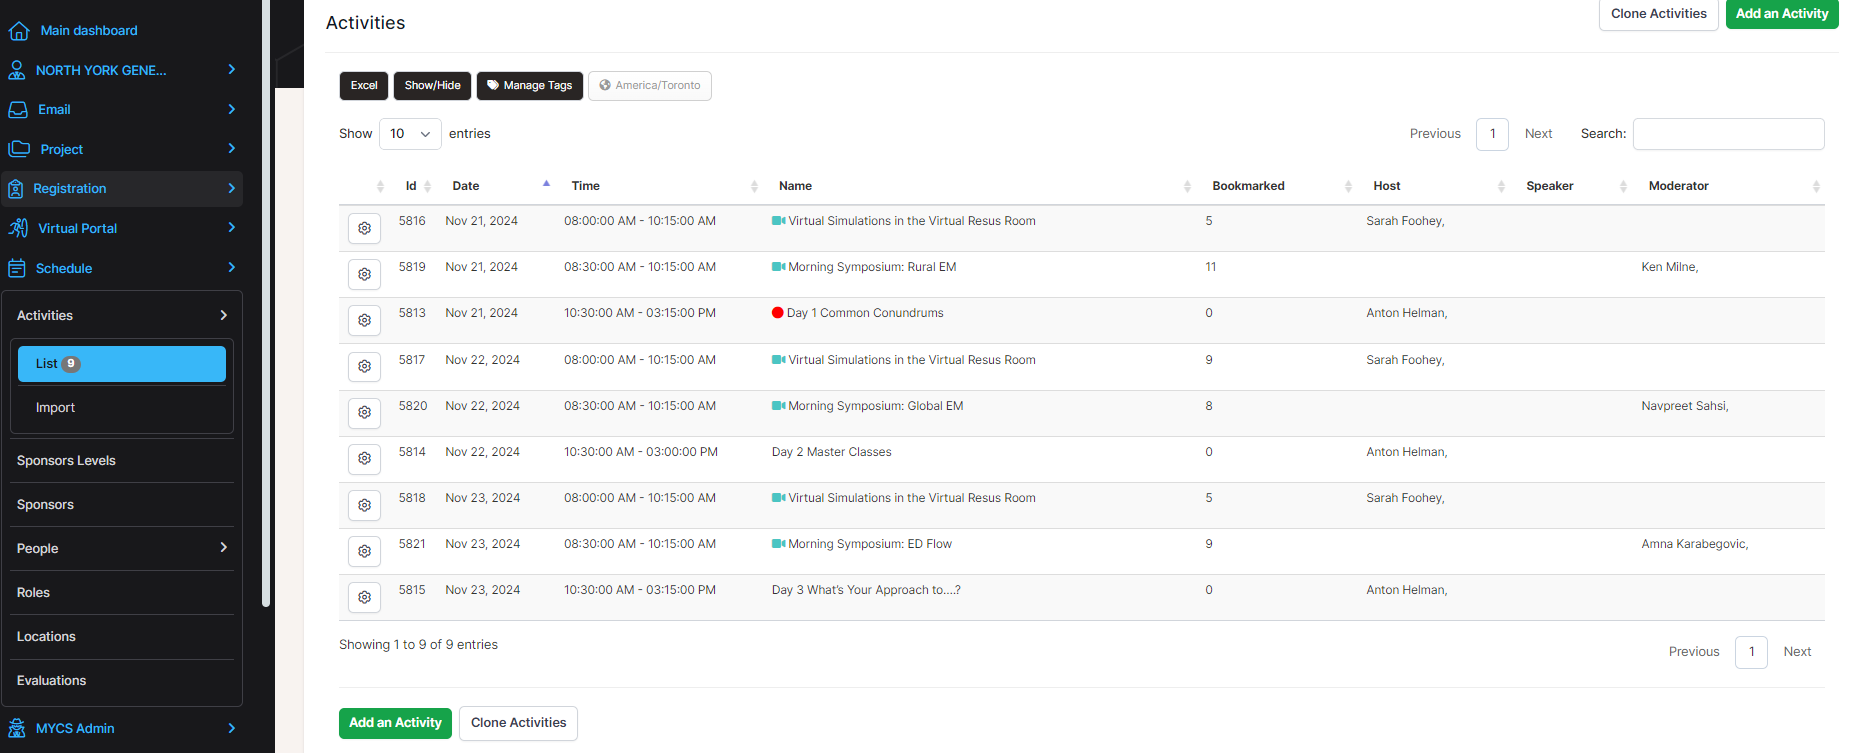
1. Activities > List
This is where you build your full schedule.
- Add an activity

-
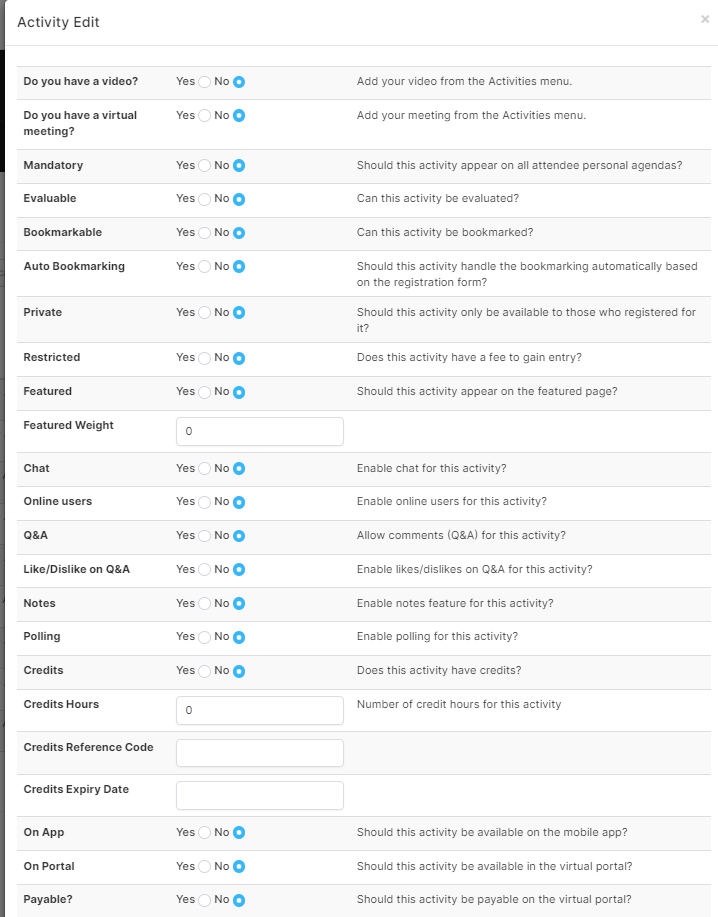
In the ADD AN ACTIVITY area, you can associate many variables to that specific session:
- The name and start date/time are the only mandatory fields.
- You will need to make the activity you create available ON APP and/or ON Portal.

- Once the activity is created, click on the gear to see all other activity options.
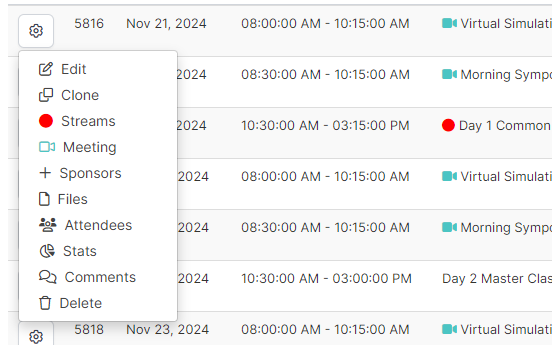
-
In this area, you can:
- Assign a Sponsor to a session.
- Add live stream, video, or meeting links.
- Add handouts/files to the activity and more!
- You can also clone any or all activities that have similar settings to save time.
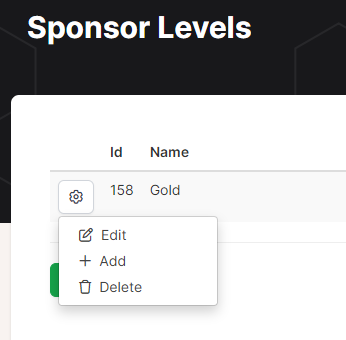
2. Sponsor Levels
If you have enabled Sponsor Levels, this is where you would build those.
- Click ADD
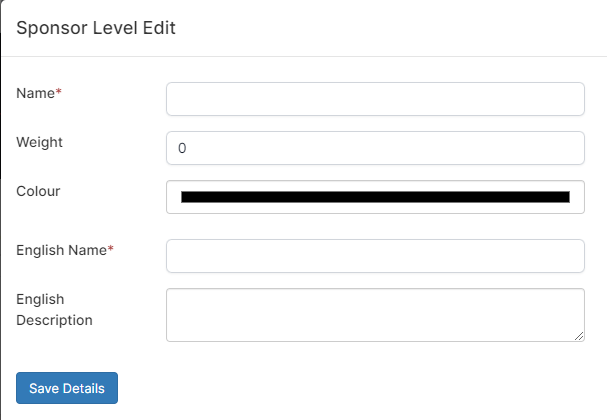
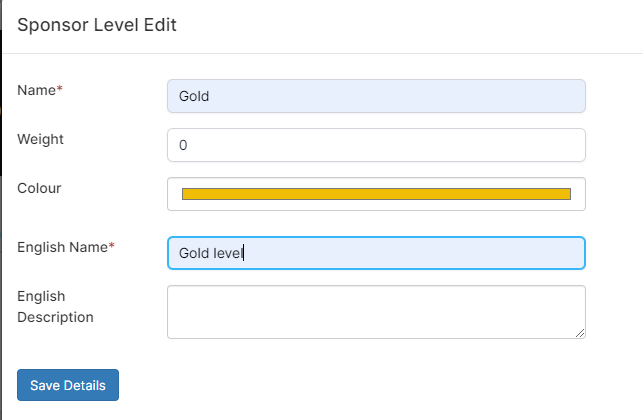
- Once the level is created, use the gear, then + to add your already created sponsors.
-
You can create as many levels as required. Once you create the sponsors, you can add them to the level.
NOTE: You can have a sponsor in more than one level!
3. Sponsors
-
Create your Sponsor list by clicking on SCHEDULE > SPONSORS > ADD A SPONSOR
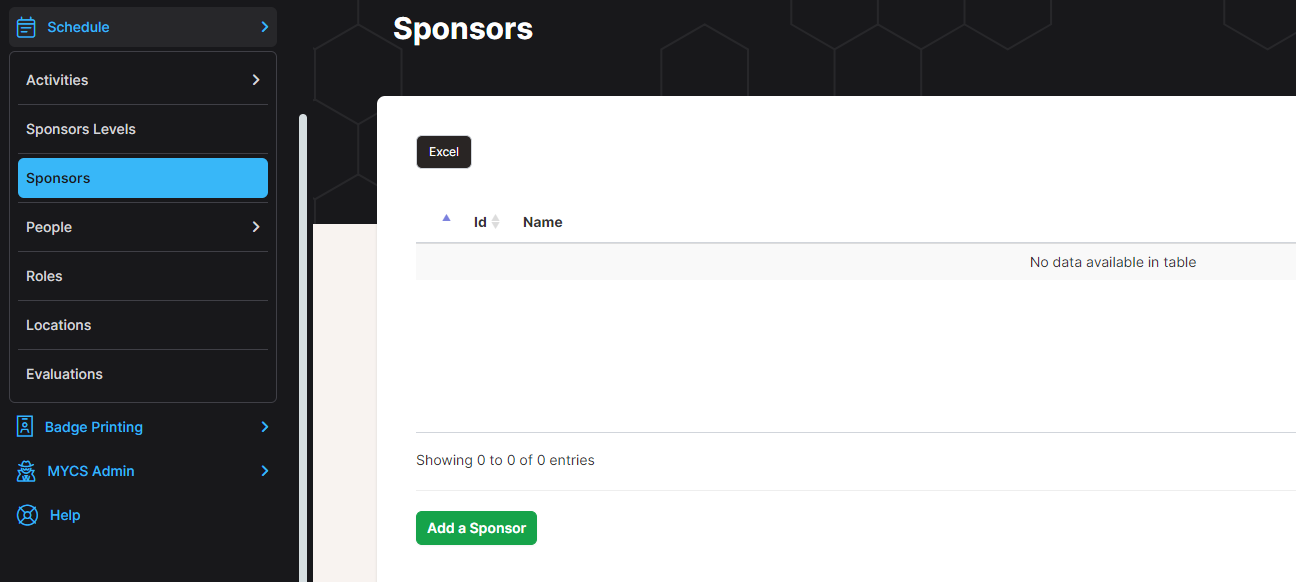
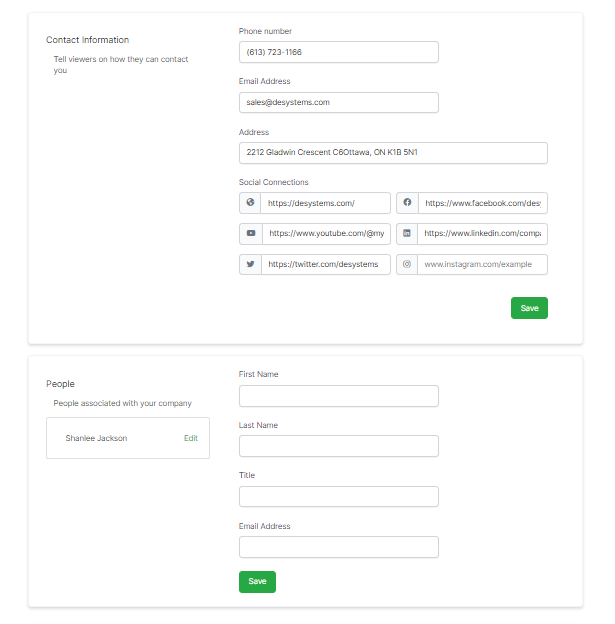
- Enter as much content as you have. The most important content is the LOGO, Website, and Name.
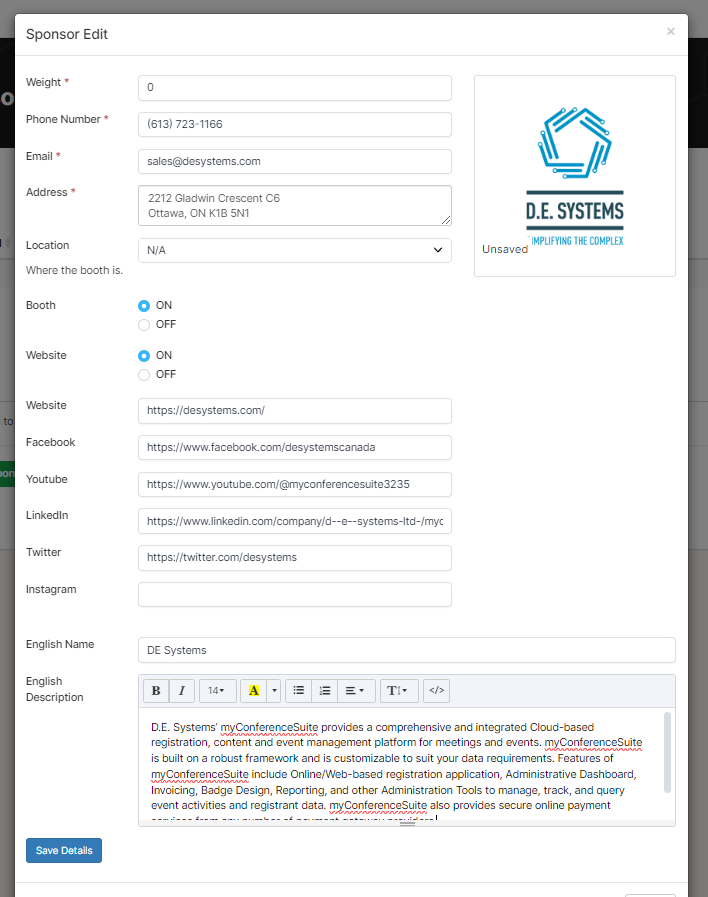
-
Adding content can be executed in two ways:
- From the backend by an admin user.
- In the frontend Sponsor Dashboard, where a person from the organization can add content.
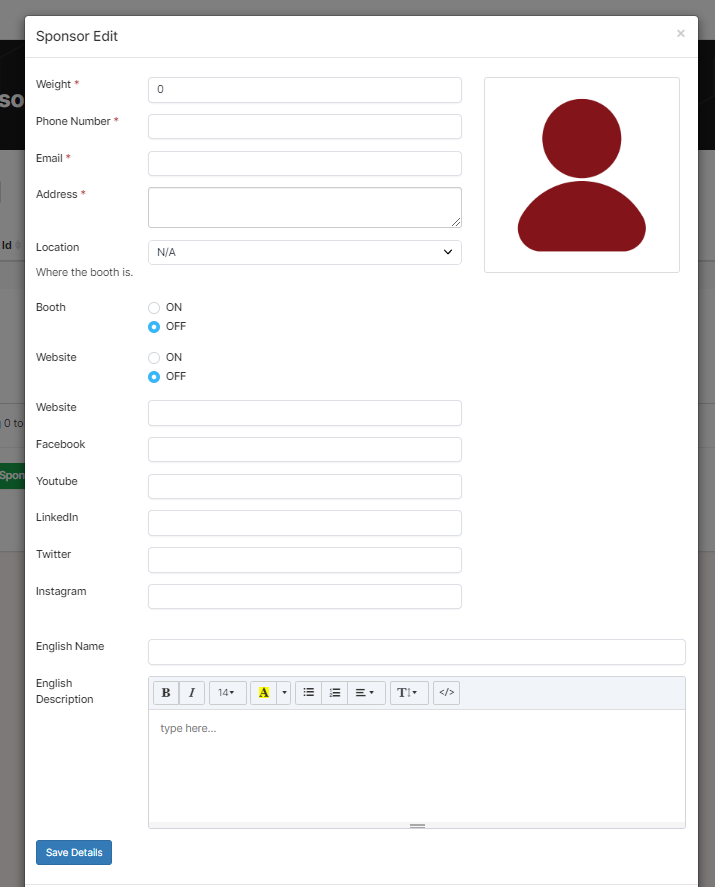
- You must activate the Website and Booth (if you are using a Virtual Booth or Profile Page).
- You can also add content at any time from the backend by clicking on the gear.
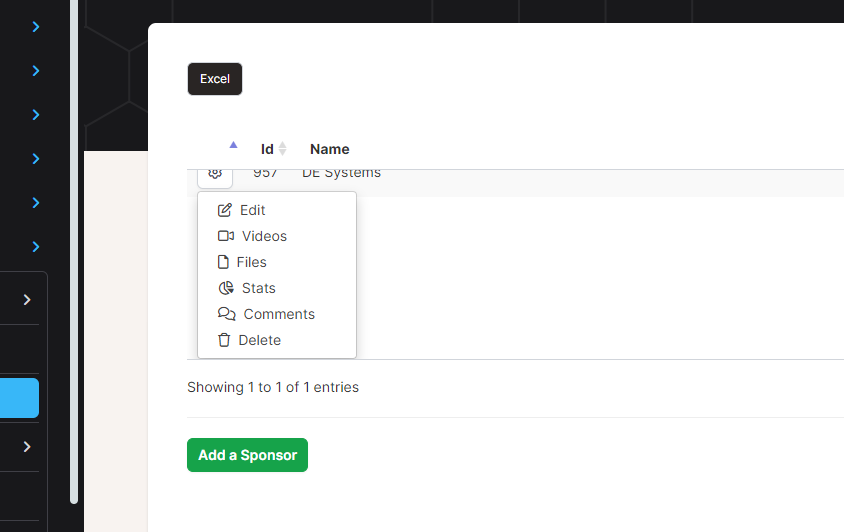
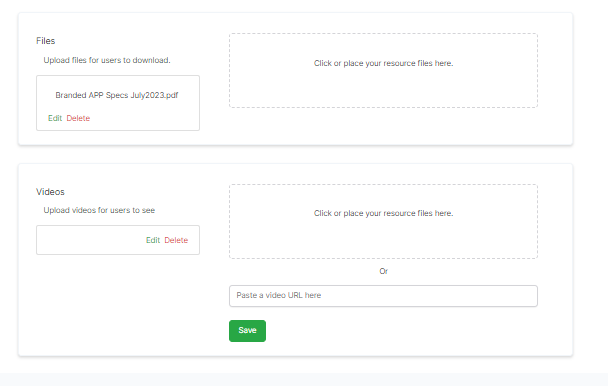
- Videos, files, documents, and images can be added here.
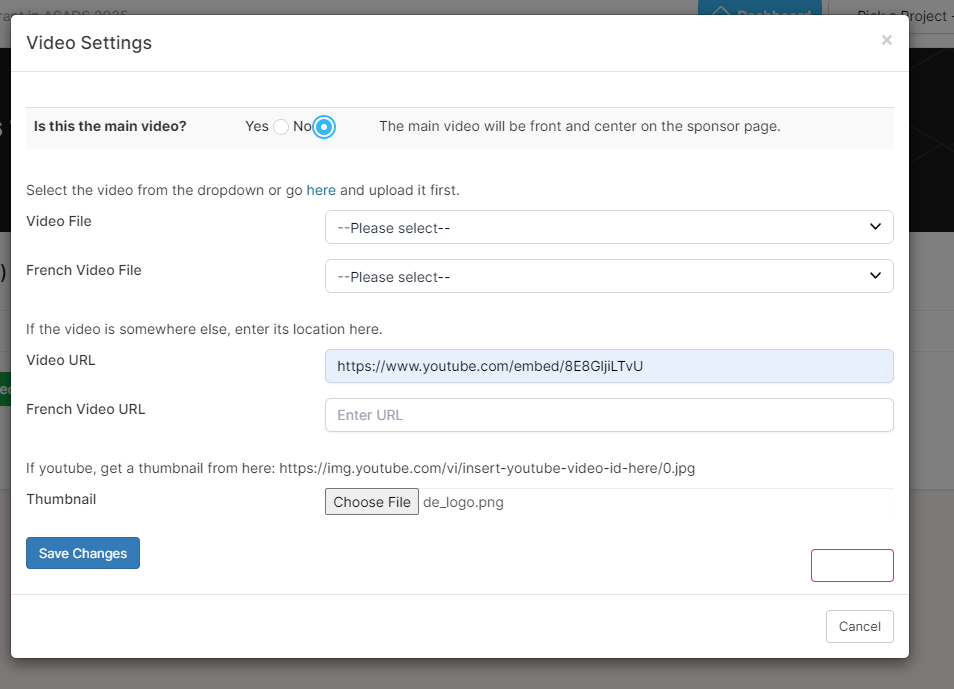
-
Add Videos:
- You can have several videos.
- Use one video in the top header of the booth, called MAIN VIDEO.
- Videos can be uploaded or you can use a Vimeo or YouTube EMBED link.
- You can also add a thumbnail image to appear as the hold image.
-
Add Files or Images:
- Upload your documents here.
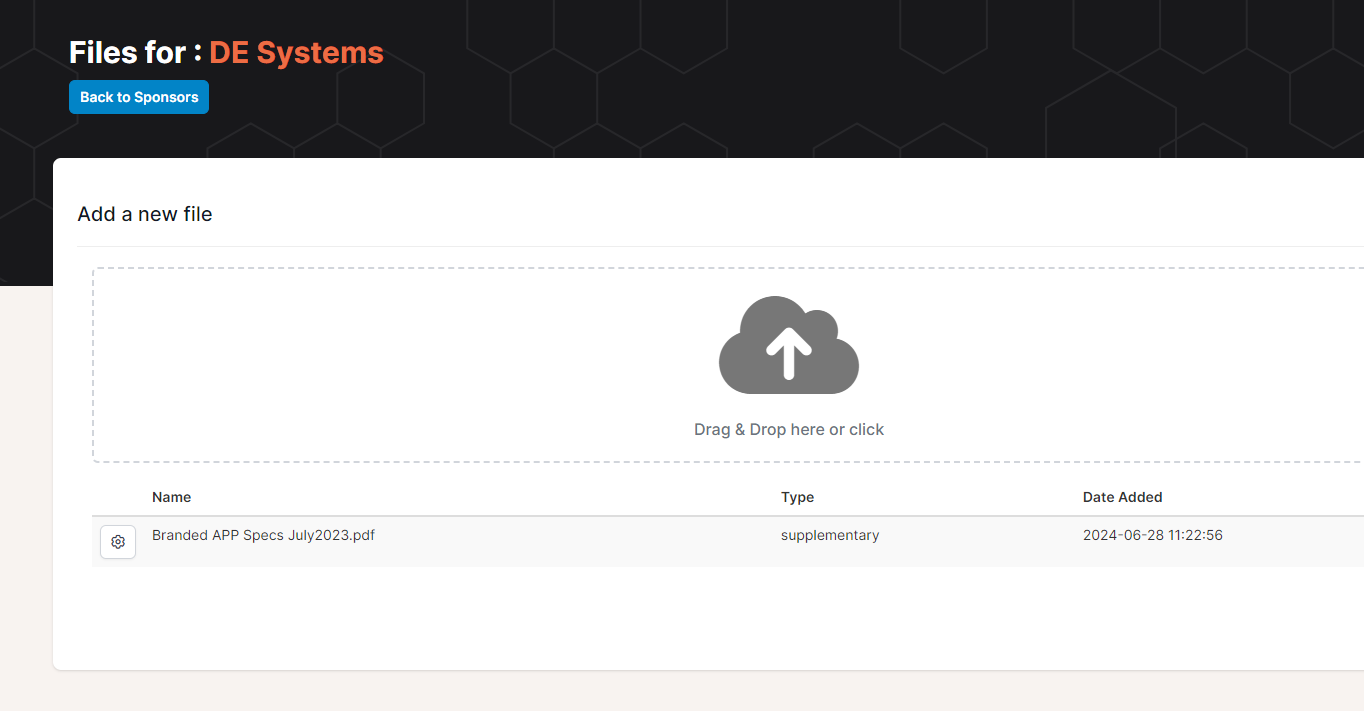
- Edit how those documents appear here.
- Upload your documents here.
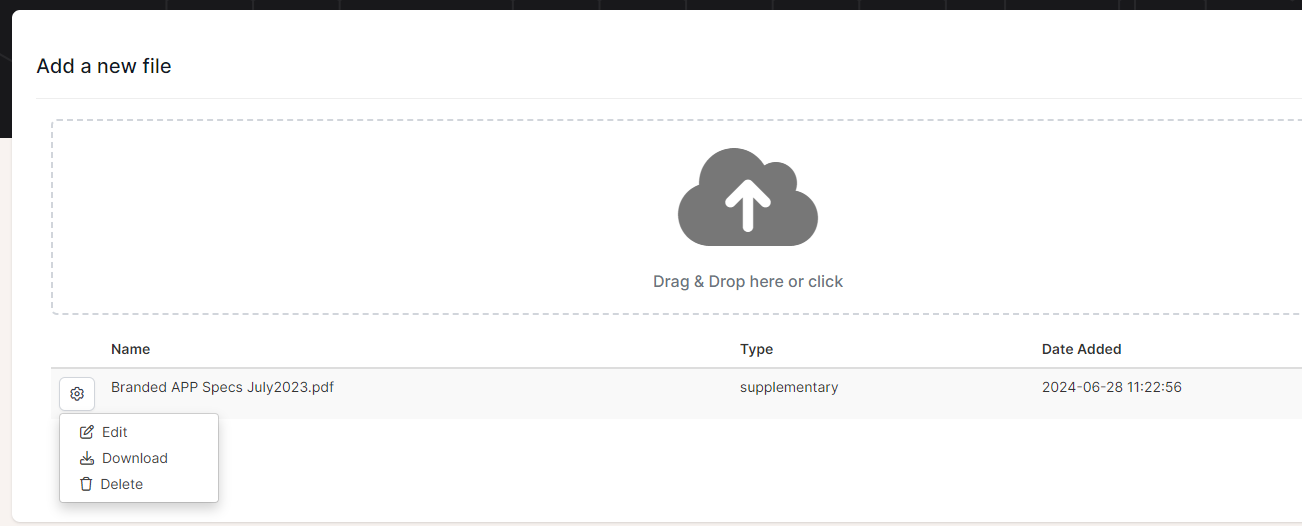
-
You can decide the TYPE of file here:
- Banner is the top banner in the Virtual Booth. This can be either an image or video.
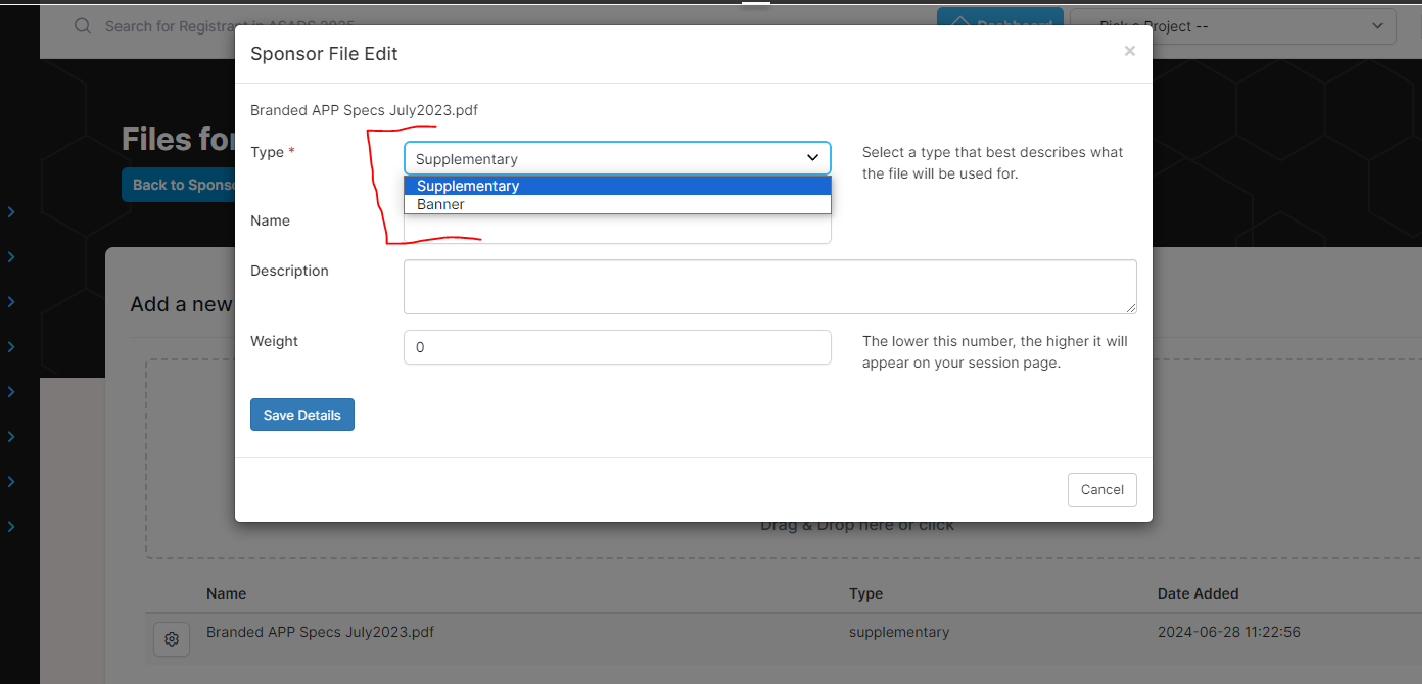
- The file will default to the uploaded name. You can change that name here and add a description.
Sponsor Dashboard
Setting Up the Sponsor Dashboard
You can have people from the organization go into the frontend of the portal using a Sponsor Dashboard to add content. Here are the instructions to set up a Sponsor Dashboard:
- Create the Sponsor: Add at least the NAME and activate the website and Booth.
-
Add the person who will be adding the content from the organization:
- See the "Add People" section for more details.
-
The person must be registered for the event:
- Refer to the "Add Registrant" section for more information on registration.
-
Link the Registrant and People record:
- Ensure the correct linkage is made between the registrant and the person who will add the content.
-
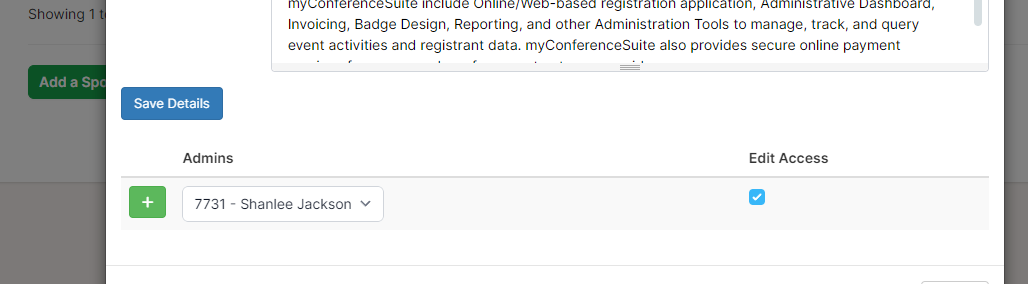
Add the person to the Virtual Profile:
- Click the "+" from the dropdown list of people to add them to the Virtual Profile.
- Ensure the "edit" button is checked to grant them editing capabilities in the dashboard.
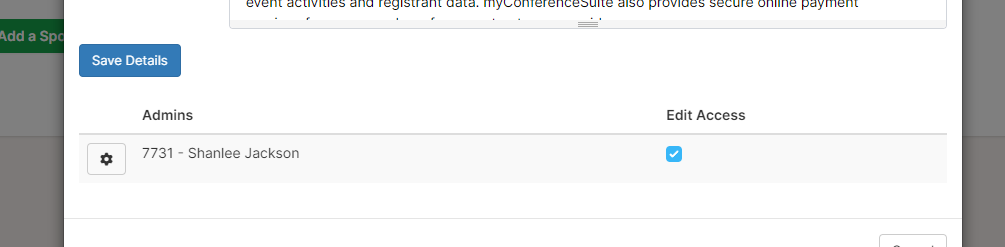
-
Admin access to the Sponsor Dashboard:
- The admin person will now have access to the Sponsor Dashboard on the frontend of the portal.
- They will need to be given their username and confirmation key to access the dashboard from the Virtual Portal.
-
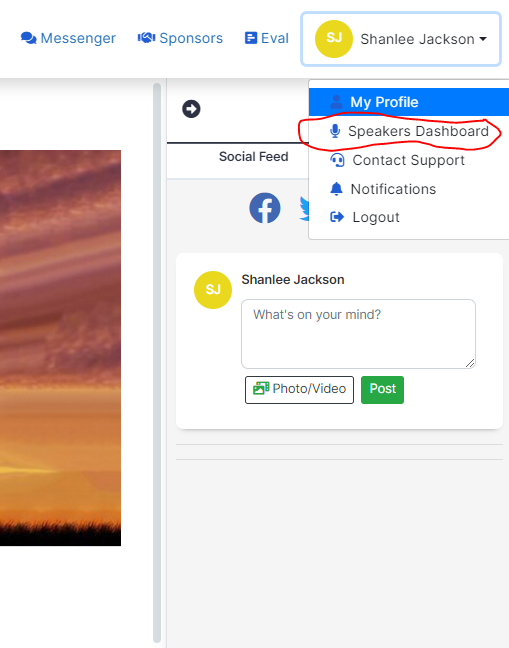
Log in to the portal:
- Once logged in, go to the top right corner and use the dropdown menu to find the dashboard.
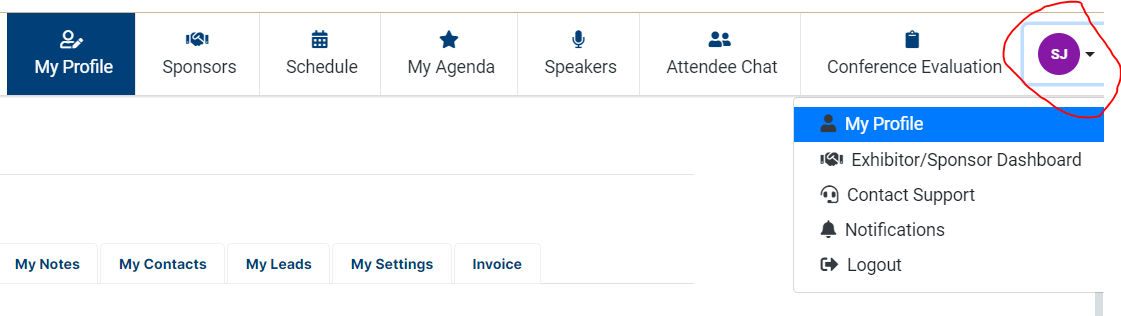
-
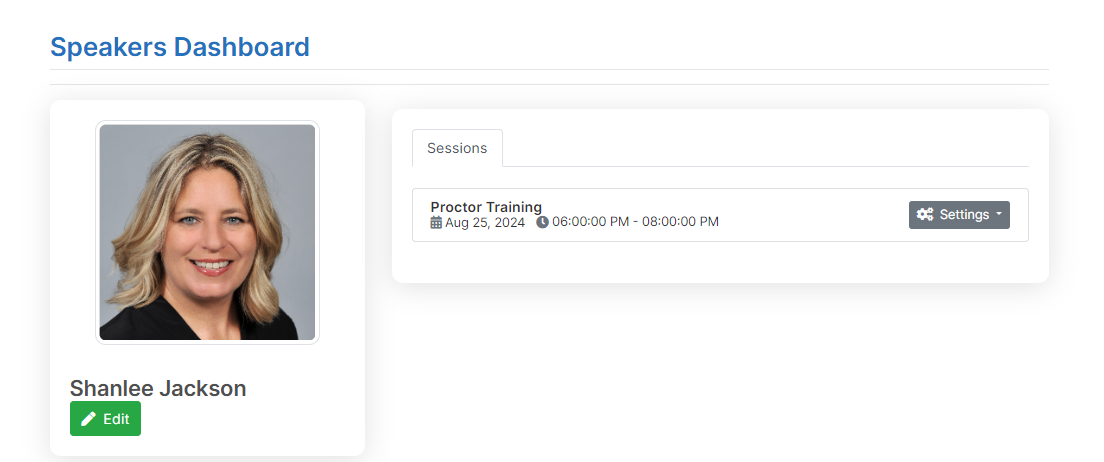
Dashboard editing capabilities:
- Once in the dashboard, the admin user can edit all the areas as instructed above.
- Post-event, the admin user can also view statistics in this area.

-
Guide for Sponsors:
- We have a handy guide to help walk your Sponsors through the dashboard.
People Section & Roles (Speakers, Moderators, Sponsors)
Creating Roles and Adding People
To properly assign roles to the people involved in your event, follow these instructions:
- Create the Roles: First, create the roles for the people you will be adding.
-
Navigate to the Roles Section:
- Go to SCHEDULE > ROLES to create roles like Speakers, Moderators, Panellists,
etc.
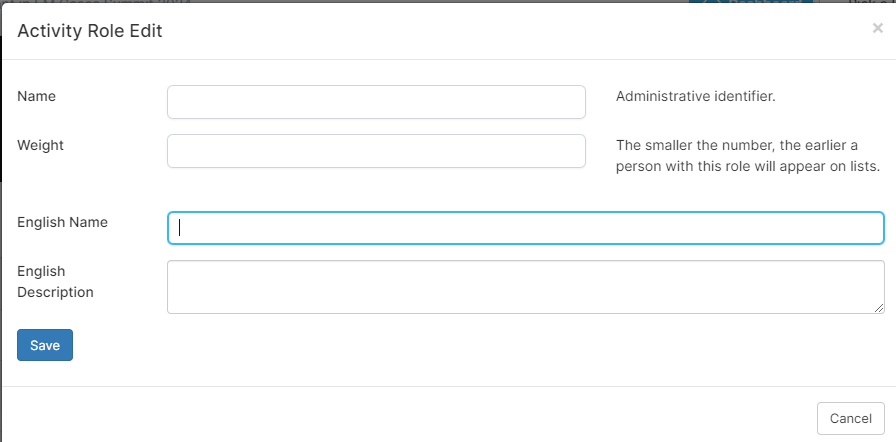
- Go to SCHEDULE > ROLES to create roles like Speakers, Moderators, Panellists,
etc.
- Add People and Assign Roles: Once the roles are created, you can start adding people and assigning them the roles you created above.
-
Mandatory Fields:
- Only the First and Last names are mandatory when adding people.
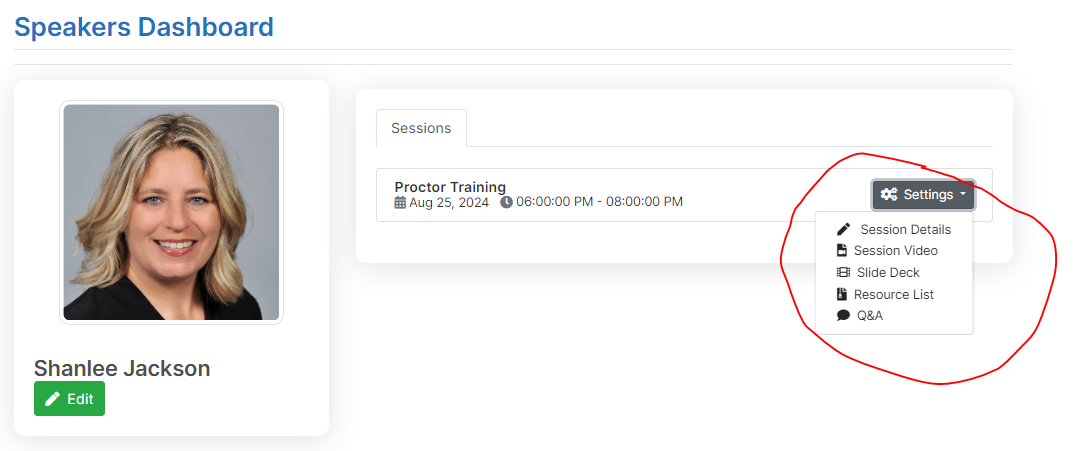
Speaker Dashboard
Setting Up the Speaker Dashboard
Much like the Sponsor Dashboard, speakers can go into the frontend of the portal using a Speaker Dashboard to add content. Follow these instructions to set up the Speaker Dashboard:
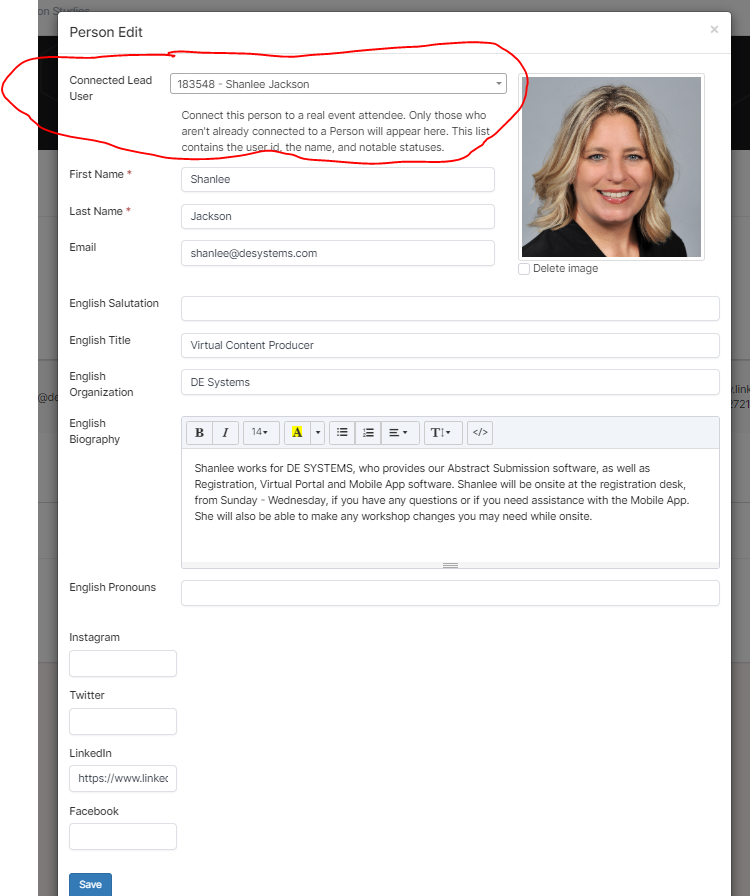
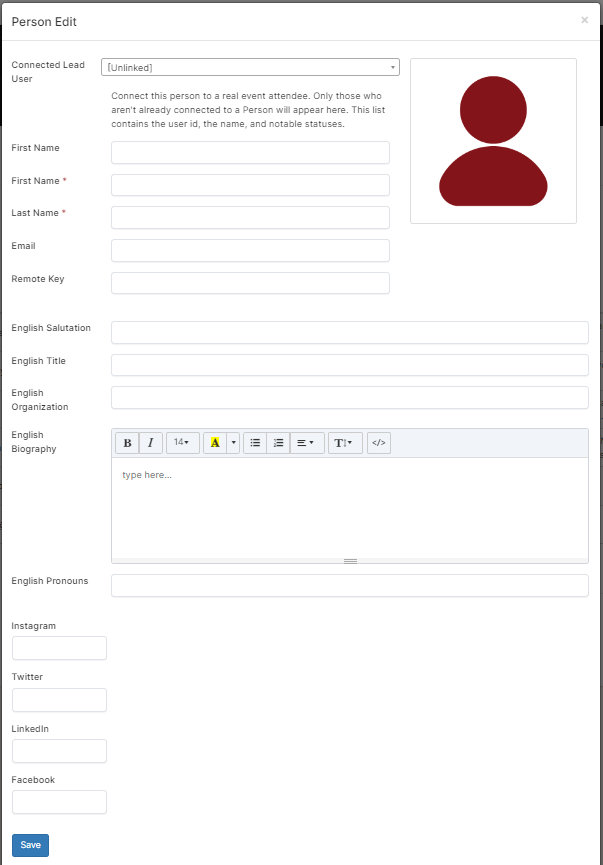
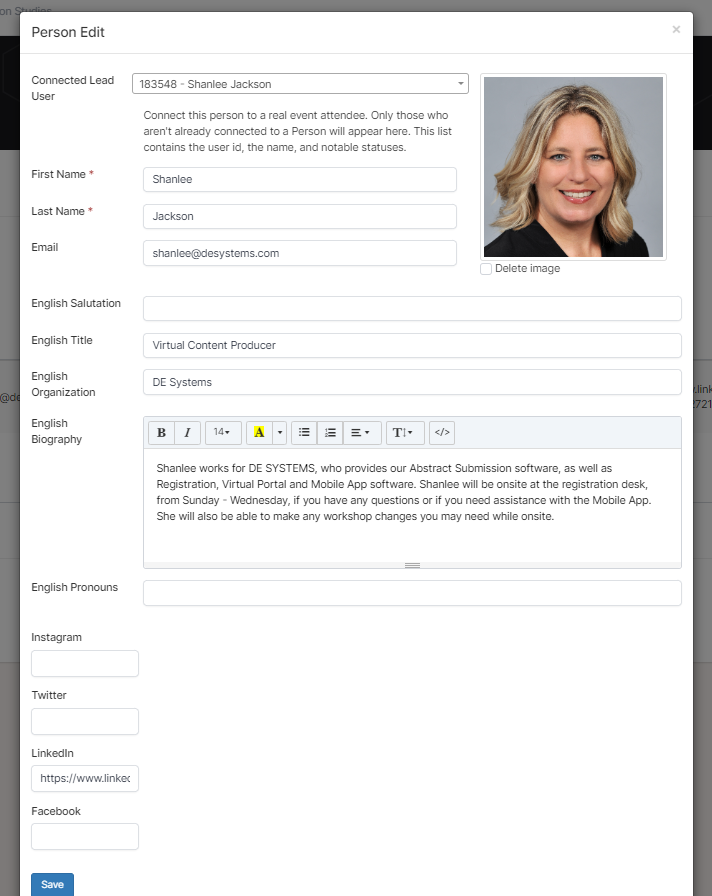
- Link the "PEOPLE" Record to the Registration Record:
- In order to activate the Speaker Dashboard, you must link the "PEOPLE" record to the registration record (Connected Lead User).
- Speaker Access to Dashboard:
- Once linked, the speaker now has access to the dashboard on the frontend of the portal.
- Dashboard Capabilities:
- Speakers can add files to their session, upload videos, moderate Q&A, and add a slide deck to their session.
Mobile App Setup Instructions
1. Enable Modules in Project Settings
In your PROJECT SETTINGS, enable the modules you will use with the app. All features include Badge, Schedule, Virtual, and Lead Retrieval for the event.
Path: PROJECT > PROJECT SETTINGS
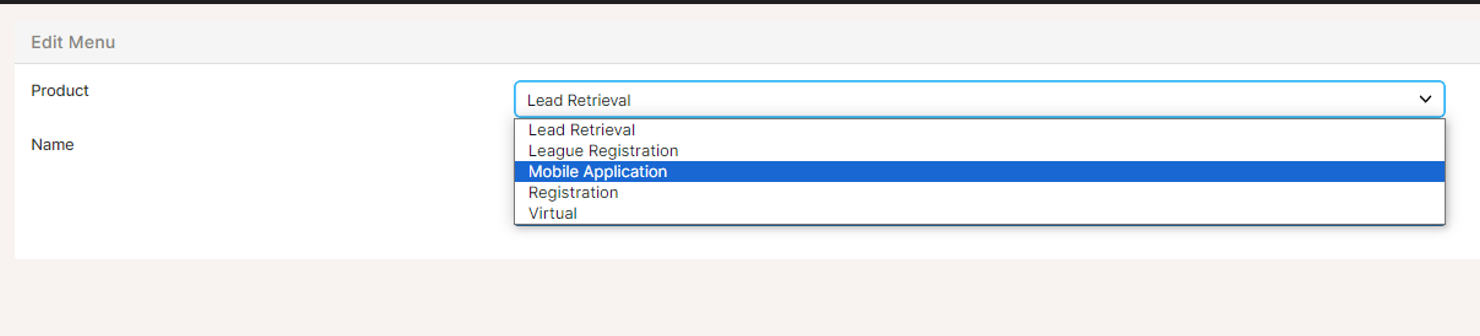
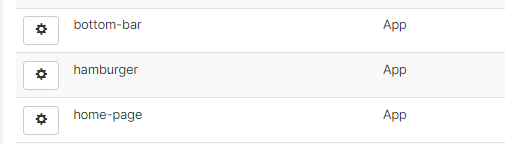
2. Create All 3 App Menus
Create the Home Page, Bottom Menu, and Hamburger Menu.
Path: PROJECT > DISPLAY (old) > MENU > + New Menu
- Select Mobile Application from the Product Dropdown.
- Add all 3 Menu types.
- Click SAVE CHANGES.
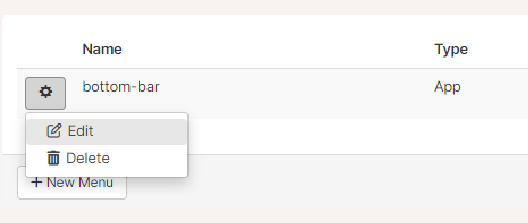
3. Create Menu Items
For each menu, click on the gear icon and select EDIT. Then, click Add Item to create menu items.
4. Build Out Menus and Icons
Start designing your menus and assigning icons. Note that:
- The Bottom Menu can only have 4 icons.
- The Home Page and Hamburger Menus can have unlimited icons.
5. Set Menu Icons
Visit FontAwesome to
choose your icons. Add the selected icon in this format:
{"icon":"fas fa-home"}
Link content to the menu item by selecting from Basic, Feature, Content, Product, Evaluation, Sub Menu, or Custom.

Internal links can be found under the BASIC dropdown.
6. Create a Badge with a QR Code
Create at least one badge type with a QR code. Ensure the QR code settings are set to "Lead URL".
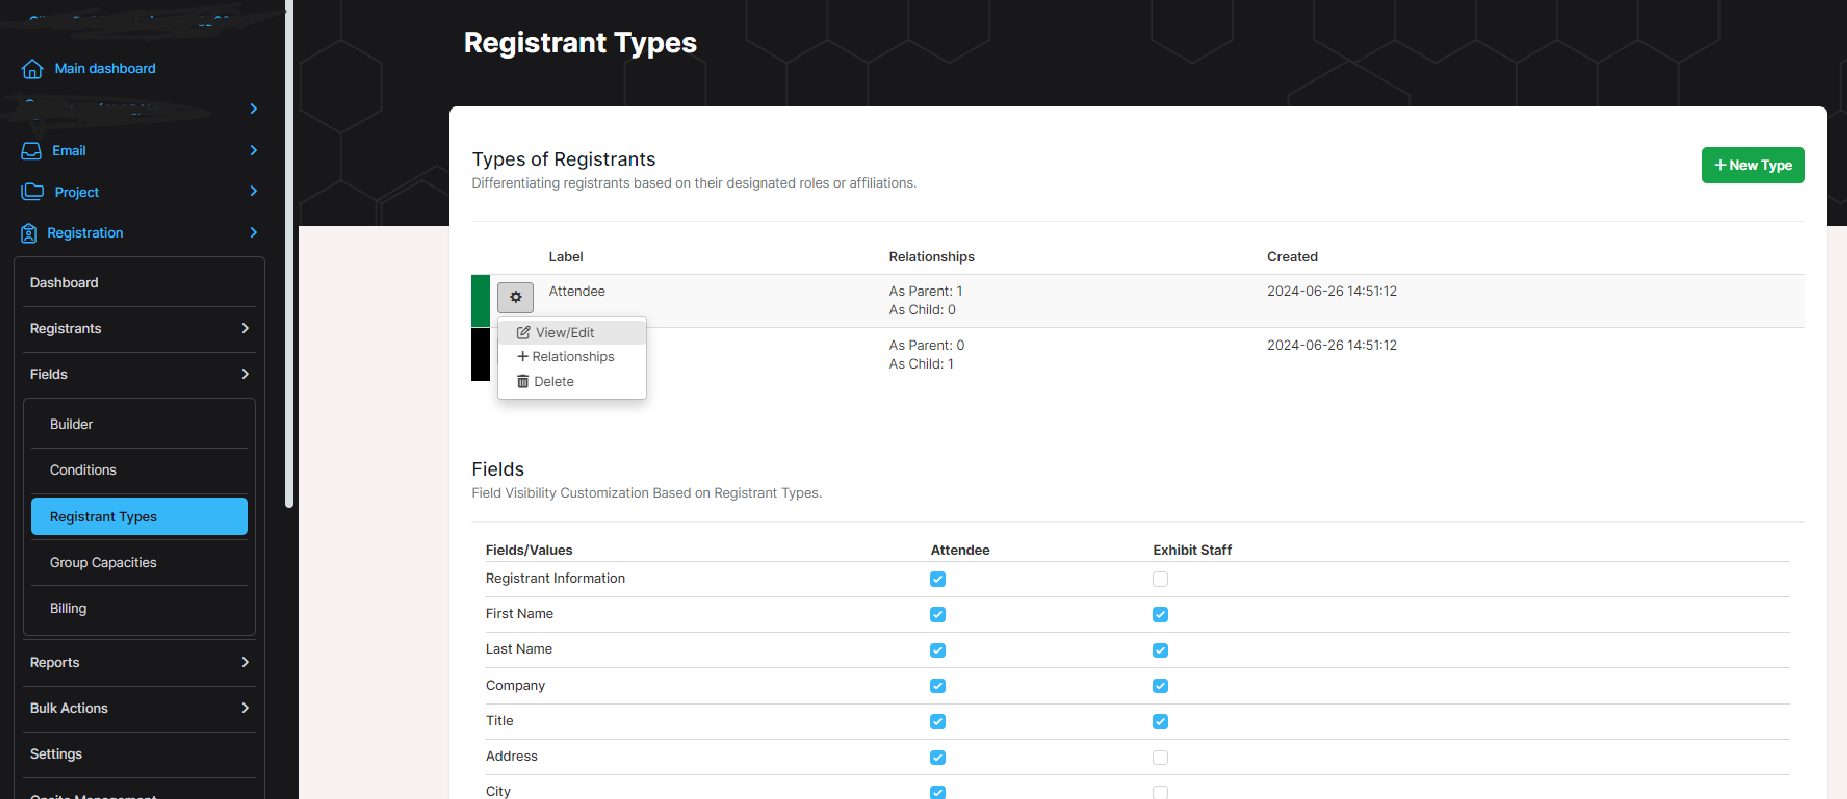
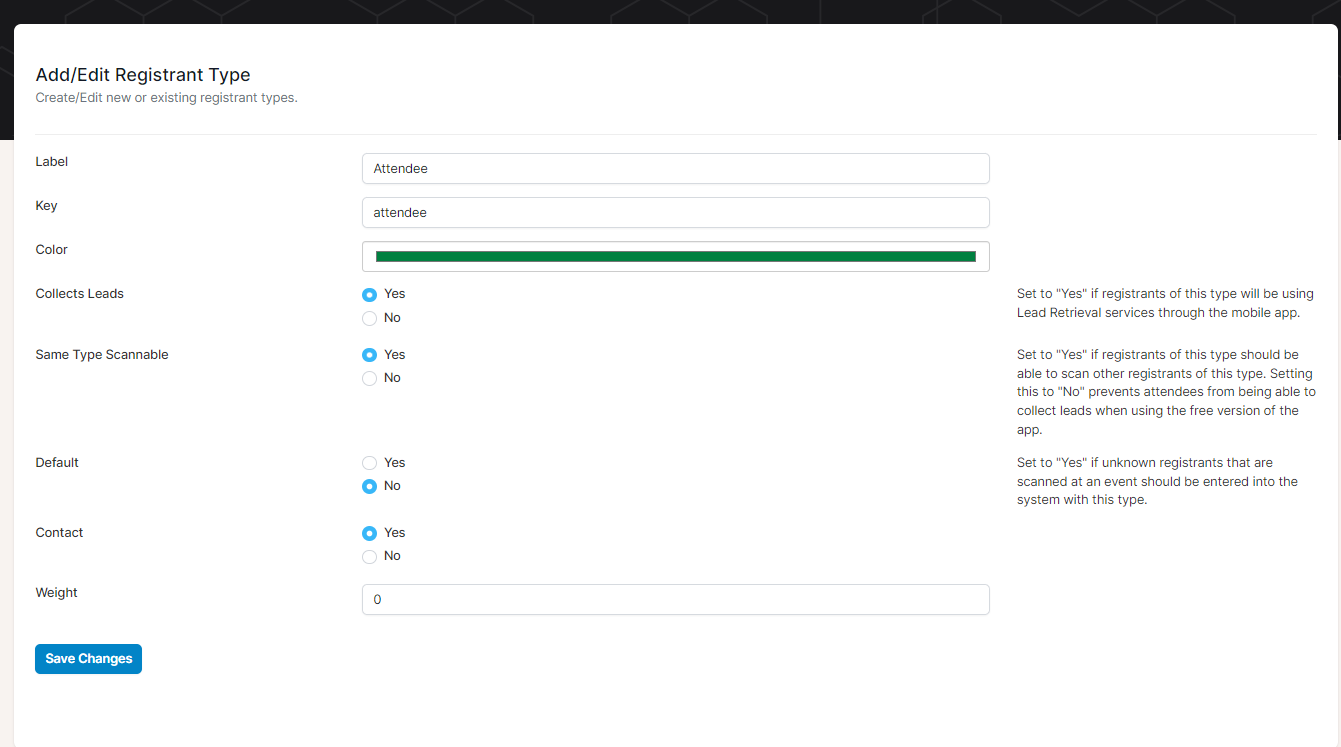
7. Configure Registrant Types
Navigate to Registration > Fields > Registrant Types and edit the registrant types to ensure compatibility with the app.
Creating and Preparing Graphics
1. Home Icon (Apple iOS)
- Size: 2732x2732 pixels
- Safe Area: Design within the center 1200x1200 pixels to avoid clipping.
- Format: PNG or JPG
Design Tips:
- Use minimalistic designs with high contrast to stand out.
- Center the logo or primary design elements within the 1200x1200 pixel safe zone.
- Ensure the background complements potential app themes (e.g., gradients or solid colors).

2. Home Icon (Android Google Play)
- Size: 1024x1024 pixels
- Safe Area: Design within the center 1200x1200 pixels to avoid cropping.
- Format: PNG for the icon and SVG for the splash screen.
Design Tips:
- Ensure key elements stay centered for better visibility.
- Maintain a clean look with no text near the edges.
- Use SVG for the splash screen to ensure scalability across devices.
3. Login Page Icon
- Size: 167x167 pixels
- Format: PNG or JPG
Design Tips:
- Create a smaller, simpler version of your primary logo.
- Ensure clarity and readability even at a small size.
4. Android Store Submission Icon
- Size: 512x512 pixels
- Format: PNG
Design Tips:
- Create a slightly more detailed version of the app logo.
- Avoid text or small intricate details near the edges.
5. Android Store Submission Feature Image
- Size: 1024x500 pixels
- Format: PNG or JPG
Design Tips:
- Highlight app features or showcase its purpose with bold imagery.
- Incorporate app screenshots or a tagline for additional appeal.

Delivery Checklist
- File Formats: Ensure all files meet the specified format requirements (PNG, JPG, SVG).
- Testing: Preview designs on relevant devices (iOS and Android) to confirm correct display.
- Organized Folder: Save all assets in a well-labeled folder (e.g., `iOS_2732x2732.png`, `Android_1024x1024.svg`).
Frequently Asked Questions (FAQ)
How do we re-send an email confirmation?
On the master menu click:
- {Registration} - {Registrants} - {Active}
- Click on the Action Button and click {view/edit}
- On the right side of the page click {Send Confirmation Email}, then click OK on the pop up
How do you set a limit on Maximum Registrations for the event?
On the master menu click:
{Registration} - {Settings} enter digits for Max Registrations
How do you add an Early bird rate?
On the master menu click:
- {Registration} - {Fields} - {Builder} enter digits for Max Registrations
- Edit the field with the value you would like an early bird rate associated to
- Go to options and check off to make a payable field
- for "How is this field payable" put "Options has Fees"
- Save changes
- Go back into the field and click on the values, you will see a $ sign under the value
- Use the toggle and drag to the appropriate early bird rate
- Enter the Early Bird Fee and the Regular Fee rates
How do you enable group registration?
In order to allow multiple registrants to register for an event you will have to enable group registration.
- In order to do this you will have to go to the main dashboard of the event and click on "Modify Event"
- Scroll down to "Enable Group Registration" and click "Yes"
- Be sure to scroll down to the bottom of the page and click "Save Changes".
- On the registration site once the first registrant has entered their information the review page will have a "Register Another" button to add another registrant to this registration.